Module 6: Deploy Developer Hub
Over the last three modules, you’ve worked with the building blocks of a well-run platform: GitOps for declarative deployment, Vault for secrets management, and managed namespaces with resource guardrails and access controls. Each of these works — but each required manual steps, CLI commands, and platform knowledge that most developers don’t have (or want). This makes it hard to scale.
This is where the developer portal comes in. Red Hat Developer Hub unifies these capabilities behind a self-service interface, so developers can discover services, create applications, and access their tools without needing to understand the underlying platform primitives. Your role as a member of the Platform Engineering team is to deploy and configure it.
Instead of building and maintaining a custom Backstage container and associated JavaScript codebase using the Backstage project, you will use Red Hat Developer Hub’s Kubernetes-native Custom Resource (CR) to deploy and configure your instance using the Red Hat Developer Hub Operator.
Learning objectives
By the end of this module, you will be able to:
-
Deploy Red Hat Developer Hub using the Backstage CR and Argo CD
-
Understand how the Red Hat Developer Hub Operator manages the deployment lifecycle of Backstage instances
-
Access your running Red Hat Developer Hub instance
Exercise 1: Explore the Configuration Files
A repository containing a basic set of configuration files has been pre-created for you - take a look at the rhdh/ocp-pe-wkshp-rhdh-configs GitLab repository.
If prompted to log in to GitLab, use username pe1 and password {common_password}.
|
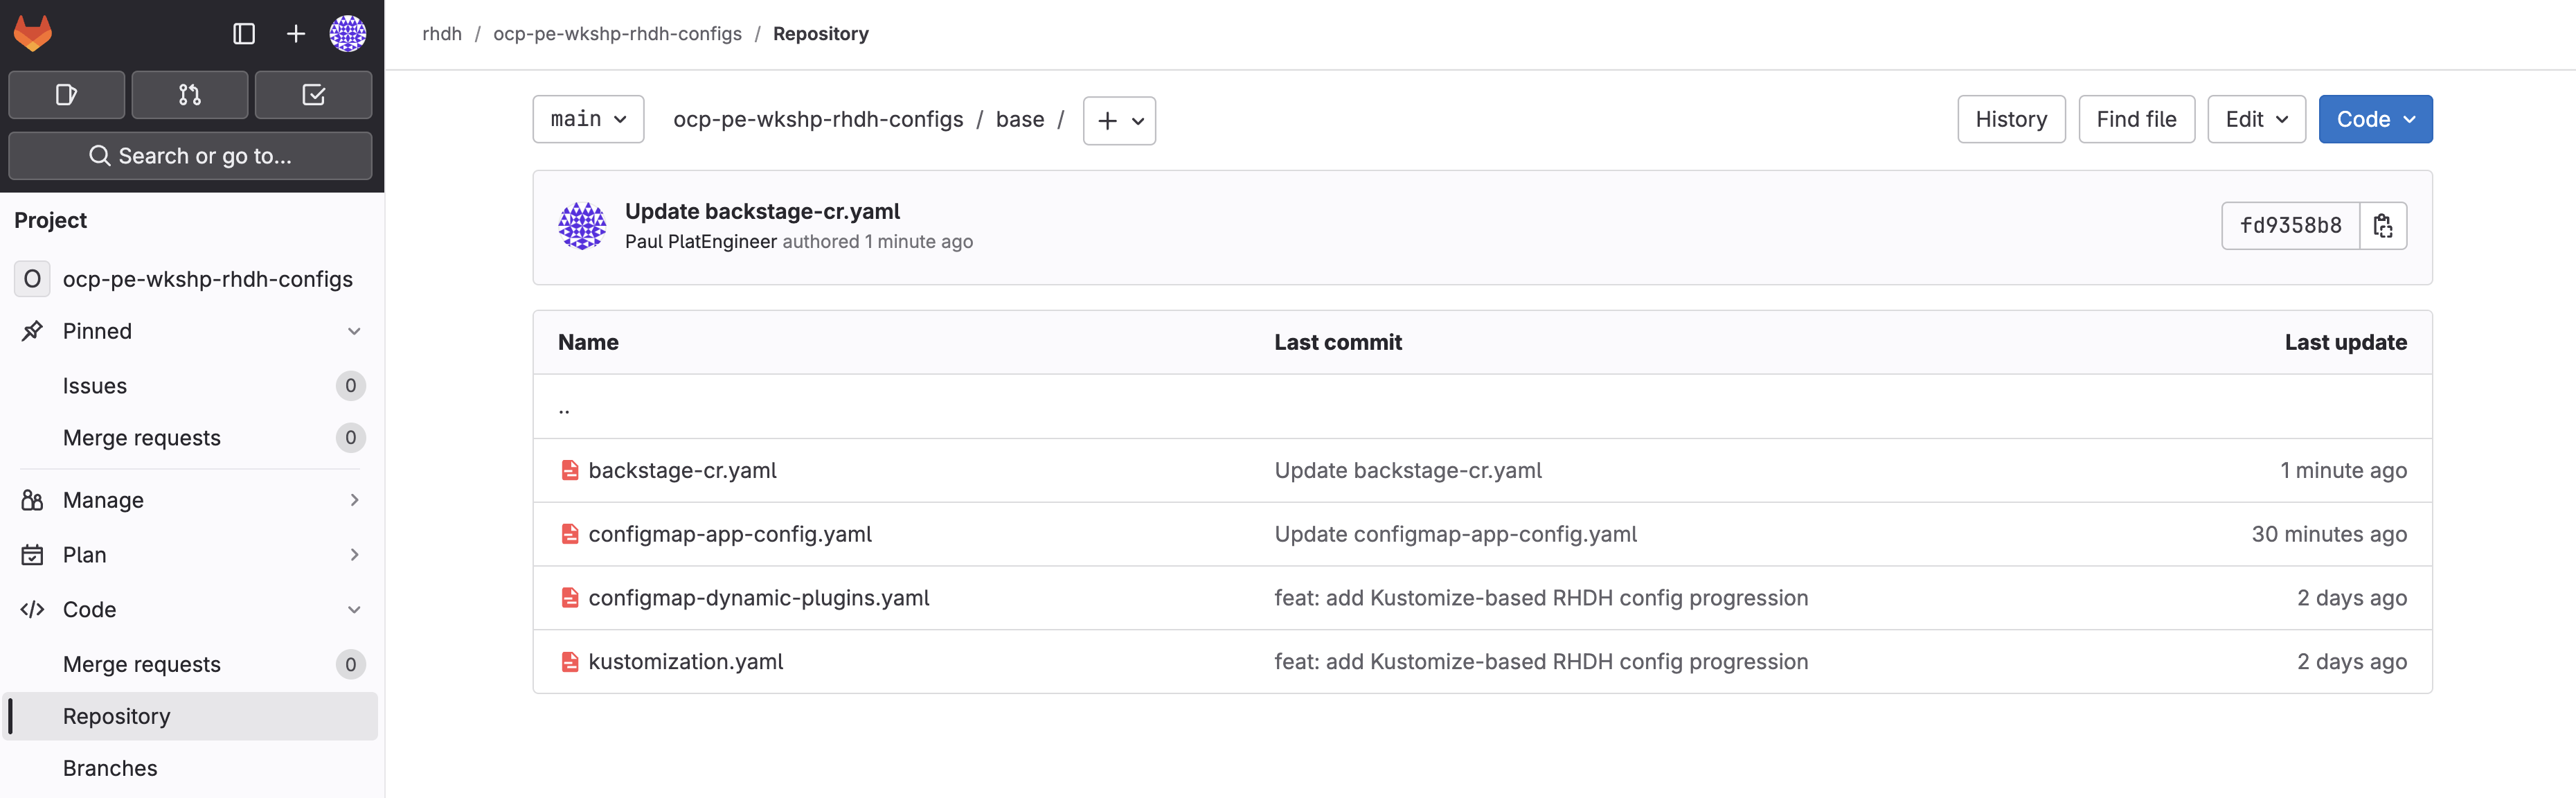
The base/ folder contains files that are used to configure an instance of Red Hat Developer Hub, plus a kustomization.yaml file - more on that last one later:
-
backstage-cr.yaml - A minimal configuration to deploy your RHDH instance.
-
configmap-app-config.yaml - Standard Backstage configuration file, stored in a Kubernetes ConfigMap.
-
configmap-dynamic-plugins.yaml - An RHDH specific configuration file that configures Backstage plugins at runtime.
| These files have inline comments that explain specific sections. It’s recommended that you review each file and the comments to gain a better understanding of how they are used to configure Red Hat Developer Hub. |
| Backstage utilizes plugins to extend it with specific features and functionality. For example, if you’d like to show the Jenkins build status for your applications in Developer Hub you’d install the Jenkins plugin. Upstream Backstage requires source code changes to add plugins. Developer Hub uses a dynamic plugin system to install and configure plugins entirely through configuration files at runtime. |
These three files are all you need to deploy and start customizing your internal developer portal using the Red Hat Developer Hub Operator.
About Kustomize
This workshop uses Kustomize overlays to manage the layers of configuration that construct and enhance your internal developer portal. Argo CD supports both Kustomize and Helm for rendering Kubernetes manifests, allowing us to use a set of base manifests to which we apply overrides per environment or per workshop module. We chose this approach to illustrate progressive enhancement of a Developer Hub deployment.
Kustomize uses the declarations in the kustomization.yaml file to "render" your configuration files. This becomes more powerful in later modules as we layer on additional configuration properties and files.
Preview the Kustomize output in the terminal using the following commands:
git clone https://gitlab-gitlab.%openshift_cluster_ingress_domain%/rhdh/ocp-pe-wkshp-rhdh-configs
oc kustomize ocp-pe-wkshp-rhdh-configs/base
These rendered files could be applied to the cluster using oc apply -k, but in your case Argo CD will take care of that.
Exercise 2: Create the Argo CD Application
You will deploy Developer Hub by creating an Argo CD Application that initially points at the base/ directory of the configuration repository. This directory contains a minimal Backstage custom resource with guest authentication and no plugins — the simplest possible deployment.
-
In the Terminal tab, create the Argo CD Application:
cat <<'EOF' | oc apply -f - apiVersion: argoproj.io/v1alpha1 kind: Application metadata: name: developer-hub namespace: openshift-gitops spec: project: pe-workshop source: repoURL: https://gitlab-gitlab.%openshift_cluster_ingress_domain%/rhdh/ocp-pe-wkshp-rhdh-configs.git targetRevision: main path: base destination: server: https://kubernetes.default.svc namespace: rhdh syncPolicy: automated: selfHeal: true EOF -
Open the Argo CD tab. Log in if prompted:
-
Click Log in via OpenShift, select the developers identity provider
-
Username:
pe1 -
Password:
{common_password}
-
-
Find the
developer-hubApplication and click into it. Watch the sync progress — Argo CD will deploy three resources:-
A
Backstagecustom resource — tells the Operator what to deploy -
A
ConfigMapwith the app-config — minimal configuration with just a title and base URL -
A
ConfigMapfor dynamic plugins — all plugins disabled for now
-
-
The Backstage resource should have a number of child resources that it manages, including the a
backstage-developer-hubDeployment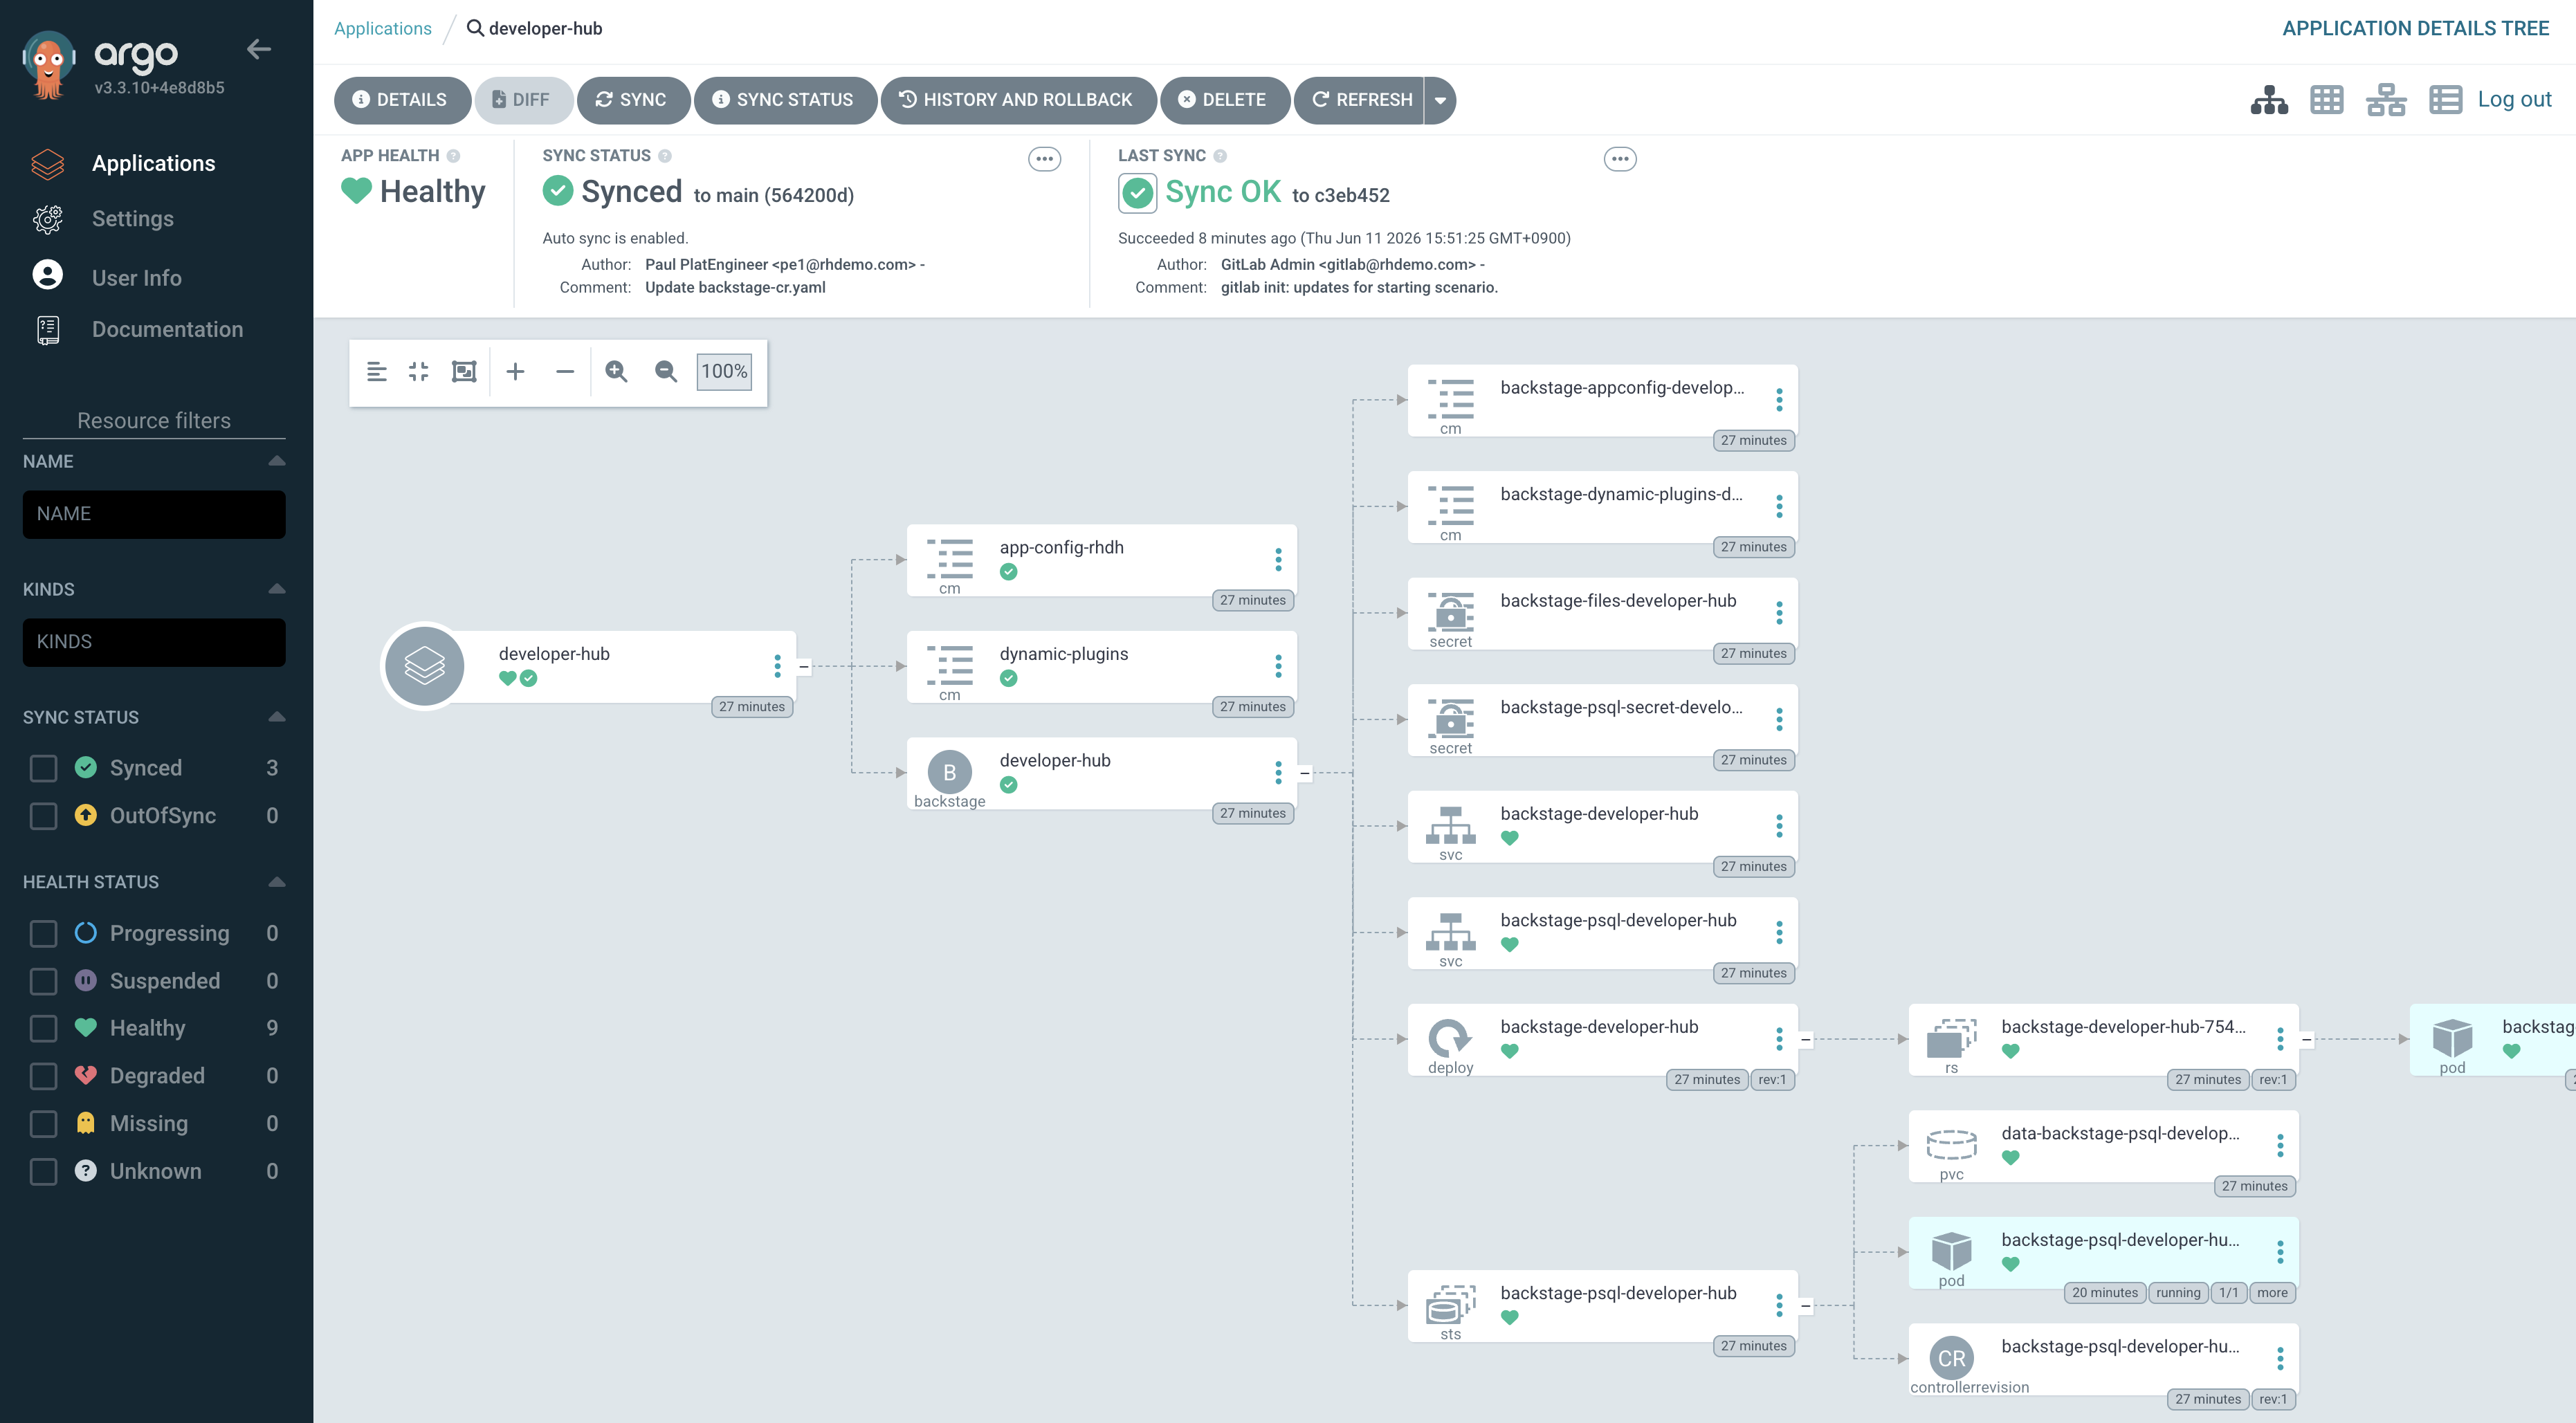 Figure 2. Showing resources managed by the developer-hub Application in Argo CD
And that’s it! You’ve deployed an instance of Red Hat Developer Hub using Operator and the Backstage CR that it uses to configure deployments.
Verify
In the Argo CD Application view, you should see:
-
Sync status: Synced
-
Health status: Healthy
-
Child resources, including a
backstage-developer-hubPod showing a green heart symbol
It can take up to 5 minutes for the initial Pod deployment to complete, as it needs to pull container images, unpack and install core Backstage and Developer Hub plugins. To observe the logs you can click the Pod in the Argo CD UI, select Logs, then choose install-dynamic-plugins in the dropdown above the log stream.
|
Exercise 3: Access Developer Hub
Once the Operator has created the deployment and the Pod is ready, Developer Hub will be accessible via a Route.
-
Select the Developer Hub tab on the right and click the refresh icon
If the tab doesn’t load immediately, wait 1-2 minutes for the pod to start. Remember, it needs to show a green heart symbol in Argo CD.
-
You should see the Developer Hub landing page with a guest authentication option
Click Enter to log in as a guest user.
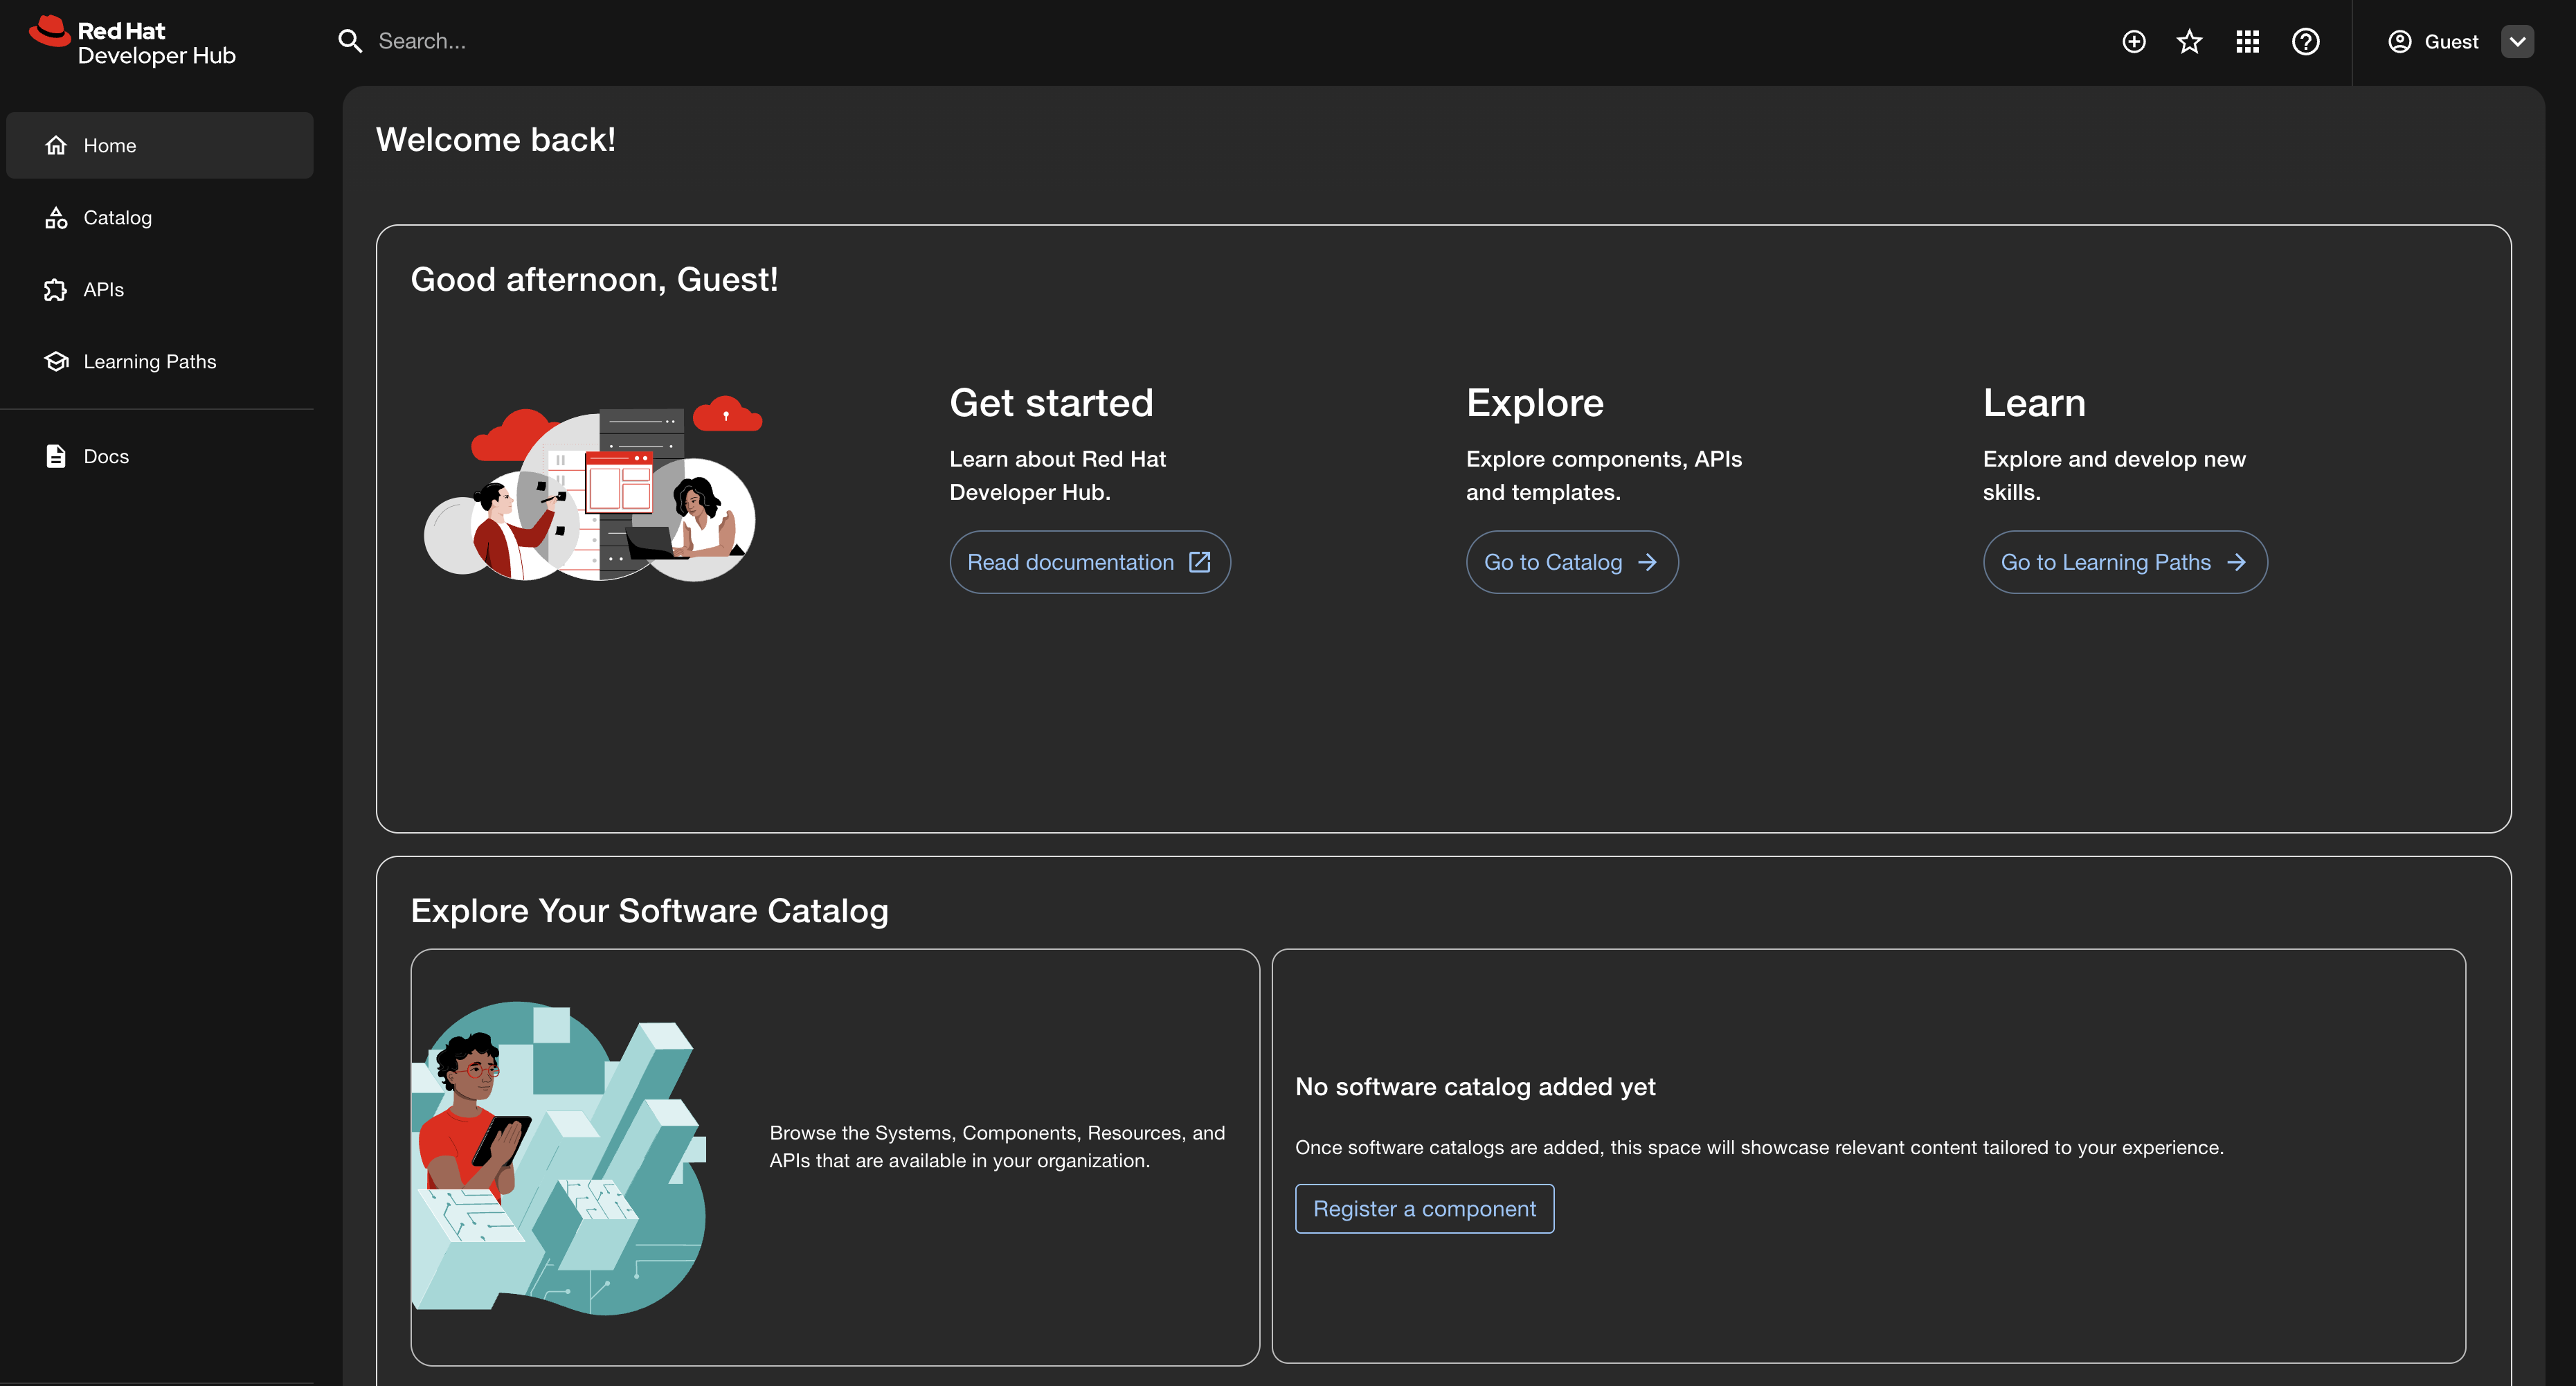 Figure 3. Red Hat Developer Hub landing page with default theme
 -
Explore the empty portal:
-
The Catalog page shows no Component entities — you haven’t registered anything yet
-
The Self-Service page (accessed using the plus icon in the top navbar) shows no templates — you haven’t imported any yet
-
The sidebar is minimal — no additional plugins are configured
Backstage — and therefore Developer Hub — uses Entities to represent Components, APIs, Groups, Users, and business Domains in the built-in Software Catalog. These Entities have relationships that can be viewed as a graph, or read by AI Agents to understand your businesses software architecture. You will see this in action in later modules.
-
This is the starting point. A functional Developer Hub instance deployed with a single Backstage custom resource and a basic app-config. In the next modules, you will progressively add authentication, integrations, catalog entities, and templates.
Module summary
You’ve deployed a minimal Developer Hub instance using GitOps.
What you accomplished:
-
Created an Argo CD Application in your scoped
pe-workshopproject -
Deployed Developer Hub using the Backstage custom resource provided by the Red Hat Developer Hub Operator
-
Verified the instance is running and accessible
Key takeaway: Deploying Developer Hub is operator-managed and declarative. In the modules ahead, you will progressively configure this portal to surface the platform capabilities you’ve already explored: secrets from Vault, managed namespaces with guardrails, and GitOps-driven deployments — all through a self-service interface that developers can use without filing a ticket.
Next steps: In the next module, you will switch to the next configuration overlay to add SSO authentication, platform integrations, and dynamic plugins. Developer Hub will transform from a blank canvas into a connected portal.