Module 5: Namespace as a product
When new developers join Parasol, the platform team doesn’t just hand them a namespace and wish them luck. A namespace is little more than a cluster-wide label. It logically groups cluster entities but imposes nothing. Without explicit policy, any authenticated user can read or change resources, a container could consume all of a node’s memory, and every pod in such a lawless namespace can try to reach every other pod in the cluster over the network.
The platform team thinks of a properly provisioned namespace as a product that includes the resource limits, access controls, and network policies that frame the organizational boundaries of a namespace with effective guardrails.
In this module, you will provision a managed namespace for a new dev team, then switch to a developer’s perspective to see how limits and policies are enforced.
Learning objectives
By the end of this module, you will be able to:
-
Describe what a platform team provides when they provision a namespace for a development team
-
Explain how ResourceQuotas, LimitRanges, RoleBindings, and NetworkPolicies work together to create guardrails for a managed environment
-
Experience resource limits from a developer’s perspective — including what happens when you exceed them
You will also get more practice deploying resources via Argo CD from the CLI, reinforcing the GitOps pattern from Module 3.
What goes into a managed namespace?
A namespace on its own is just an empty box. A managed namespace includes everything a team needs to work safely and independently. Managed namespaces make security and guardrails the default configuration, allowing developers more autonomy to do their work:
| Resource | Purpose |
|---|---|
Namespace |
Logical isolation — a boundary for resources, access, and policy |
ResourceQuota |
Caps total resource consumption (CPU, memory, pod count) across the entire namespace |
LimitRange |
Sets per-container defaults and maximums so developers don’t need to guess what to request |
ClusterRole |
Enables a least-privilege approach to RBAC. Roles and ClusterRoles allow administrators to create RBAC enabling developers and applications to perform CRUD operations on exactly what they need to do their job in the OpenShift cluster. |
RoleBinding |
Grants the team |
NetworkPolicy |
Controls which pods can talk to each other — in this case, only pods within the same namespace |
Provisioning all of this manually for every team is exactly the kind of repetitive, error-prone work that platform engineering eliminates. Later in this workshop, you will see how Developer Hub templates can automate this entirely.
Exercise 1: Review the manifests
The prerequisite-samples repository contains a managed-namespace/ directory with five manifests — one for each resource listed above.
-
Open the GitLab tab and navigate to rhdh/prerequisite-samples/ and open the
managed-namespace/folder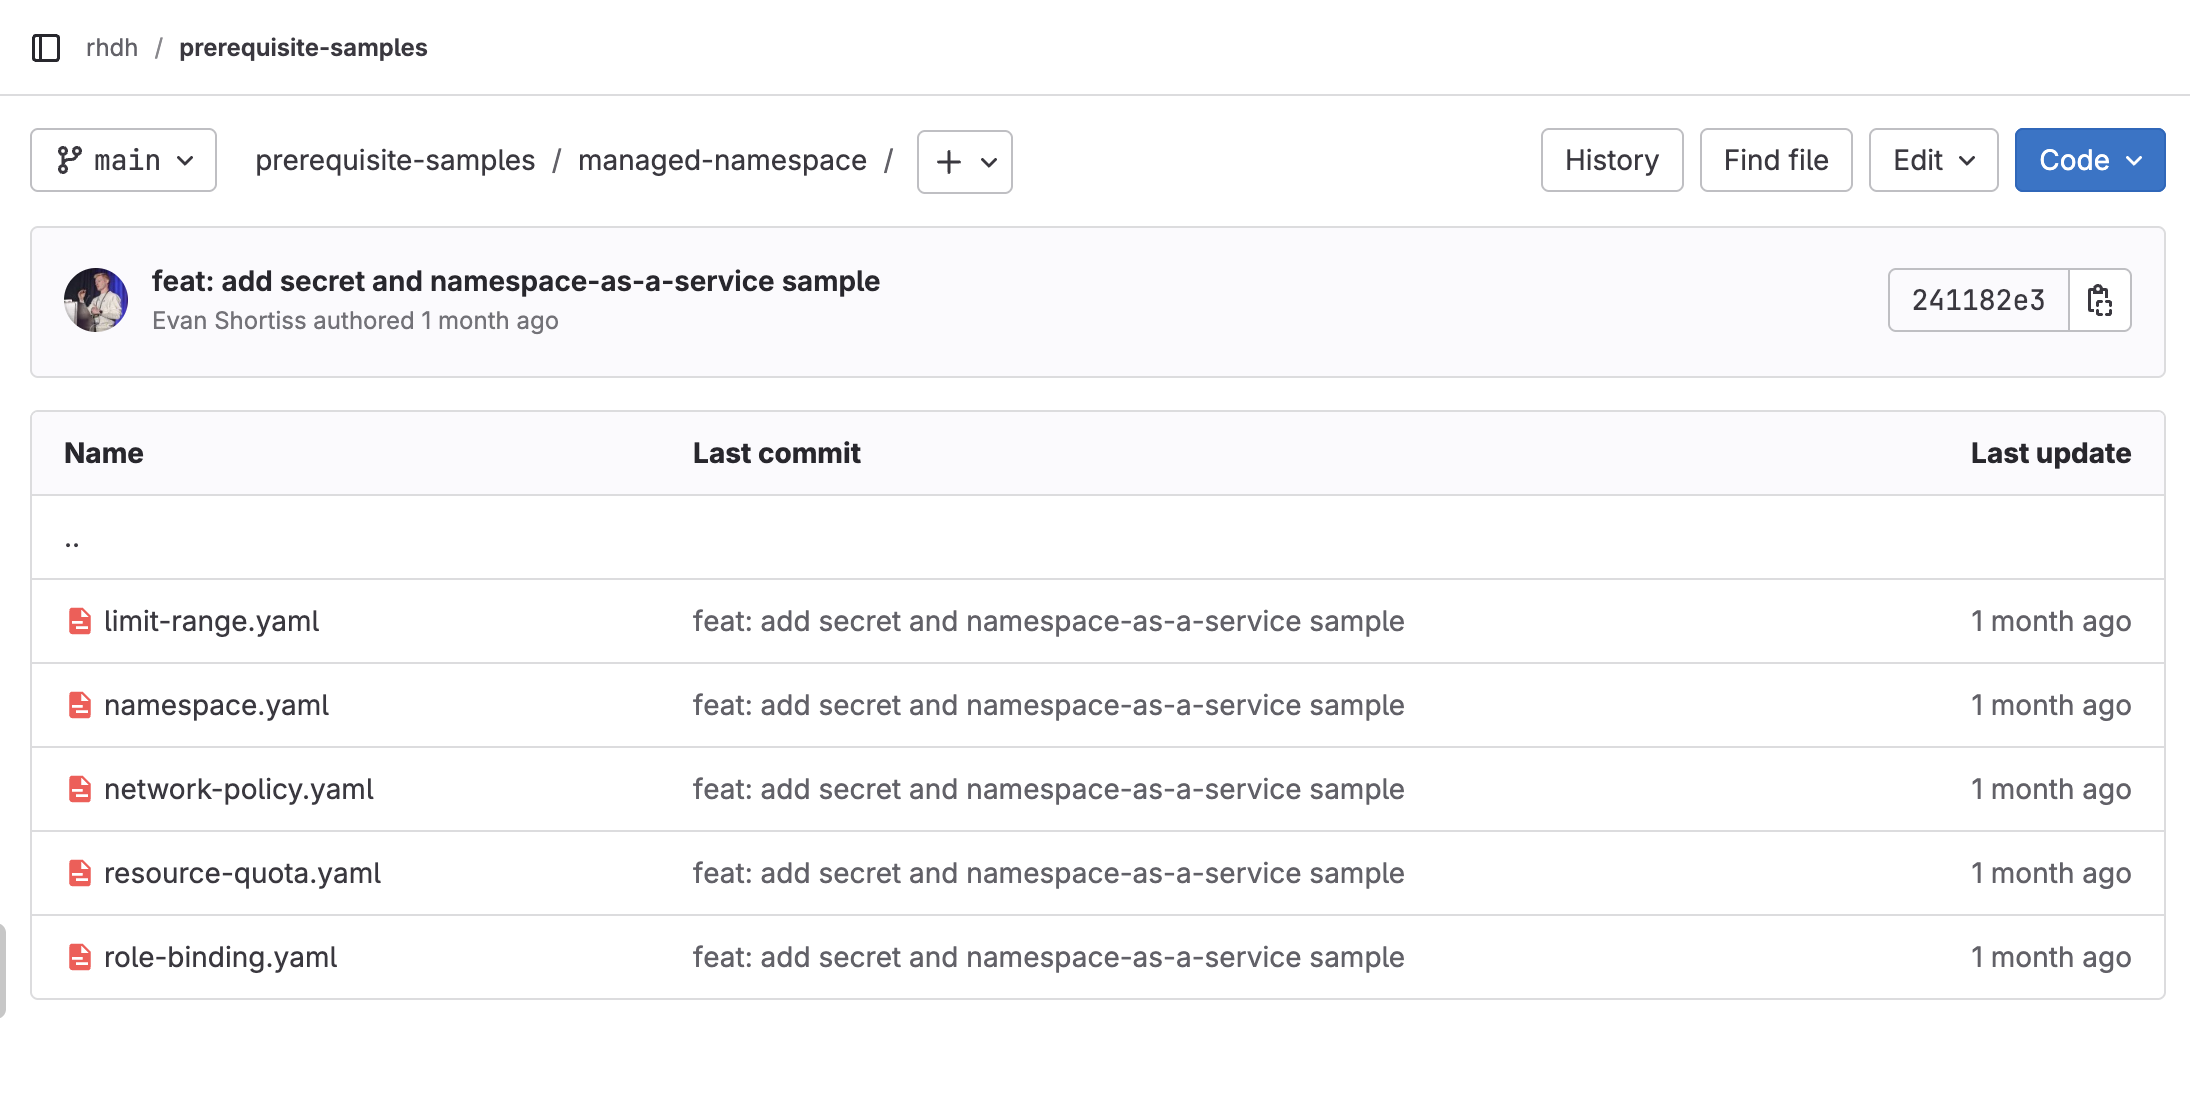 Figure 1. Namespace as a Service files in GitLab
 -
Review the key files:
-
resource-quota.yaml— Caps thedev-team-alphanamespace at 5 pods, 512Mi total memory requests, and 1Gi total memory limits -
limit-range.yaml— Sets a per-container maximum of 256Mi memory and defaults each container to 128Mi if no request is specified -
role-binding.yaml— Grants themanaged-namespaceClusterRole to usersdev1anddev2in thedev-team-alphanamespace only -
network-policy.yaml— Denies all inbound traffic except from pods within the same namespace -
managed-namespace-clusterrole.yaml— Allows developers to perform CRUD operations on exactly what they need to do their job, while protecting developers from modifying the environment in ways that they should not.
-
These files define a complete, self-contained environment for a development team.
Exercise 2: Deploy via Argo CD
In Module 3, you created Argo CD Applications using the UI. This time, you will use oc to apply the Application CR directly — the same approach a platform team would use in automation.
-
In the Terminal tab, create the Argo CD Application:
cat <<'EOF' | oc apply -f -
apiVersion: argoproj.io/v1alpha1
kind: Application
metadata:
  name: managed-namespace
  namespace: openshift-gitops
  finalizers:
    - resources-finalizer.argocd.argoproj.io
spec:
  project: pe-workshop
  source:
    repoURL: https://gitlab-gitlab.%openshift_cluster_ingress_domain%/rhdh/prerequisite-samples.git
    targetRevision: main
    path: managed-namespace
  destination:
    server: https://kubernetes.default.svc
    namespace: dev-team-alpha
  syncPolicy:
    automated:
      selfHeal: true
EOF
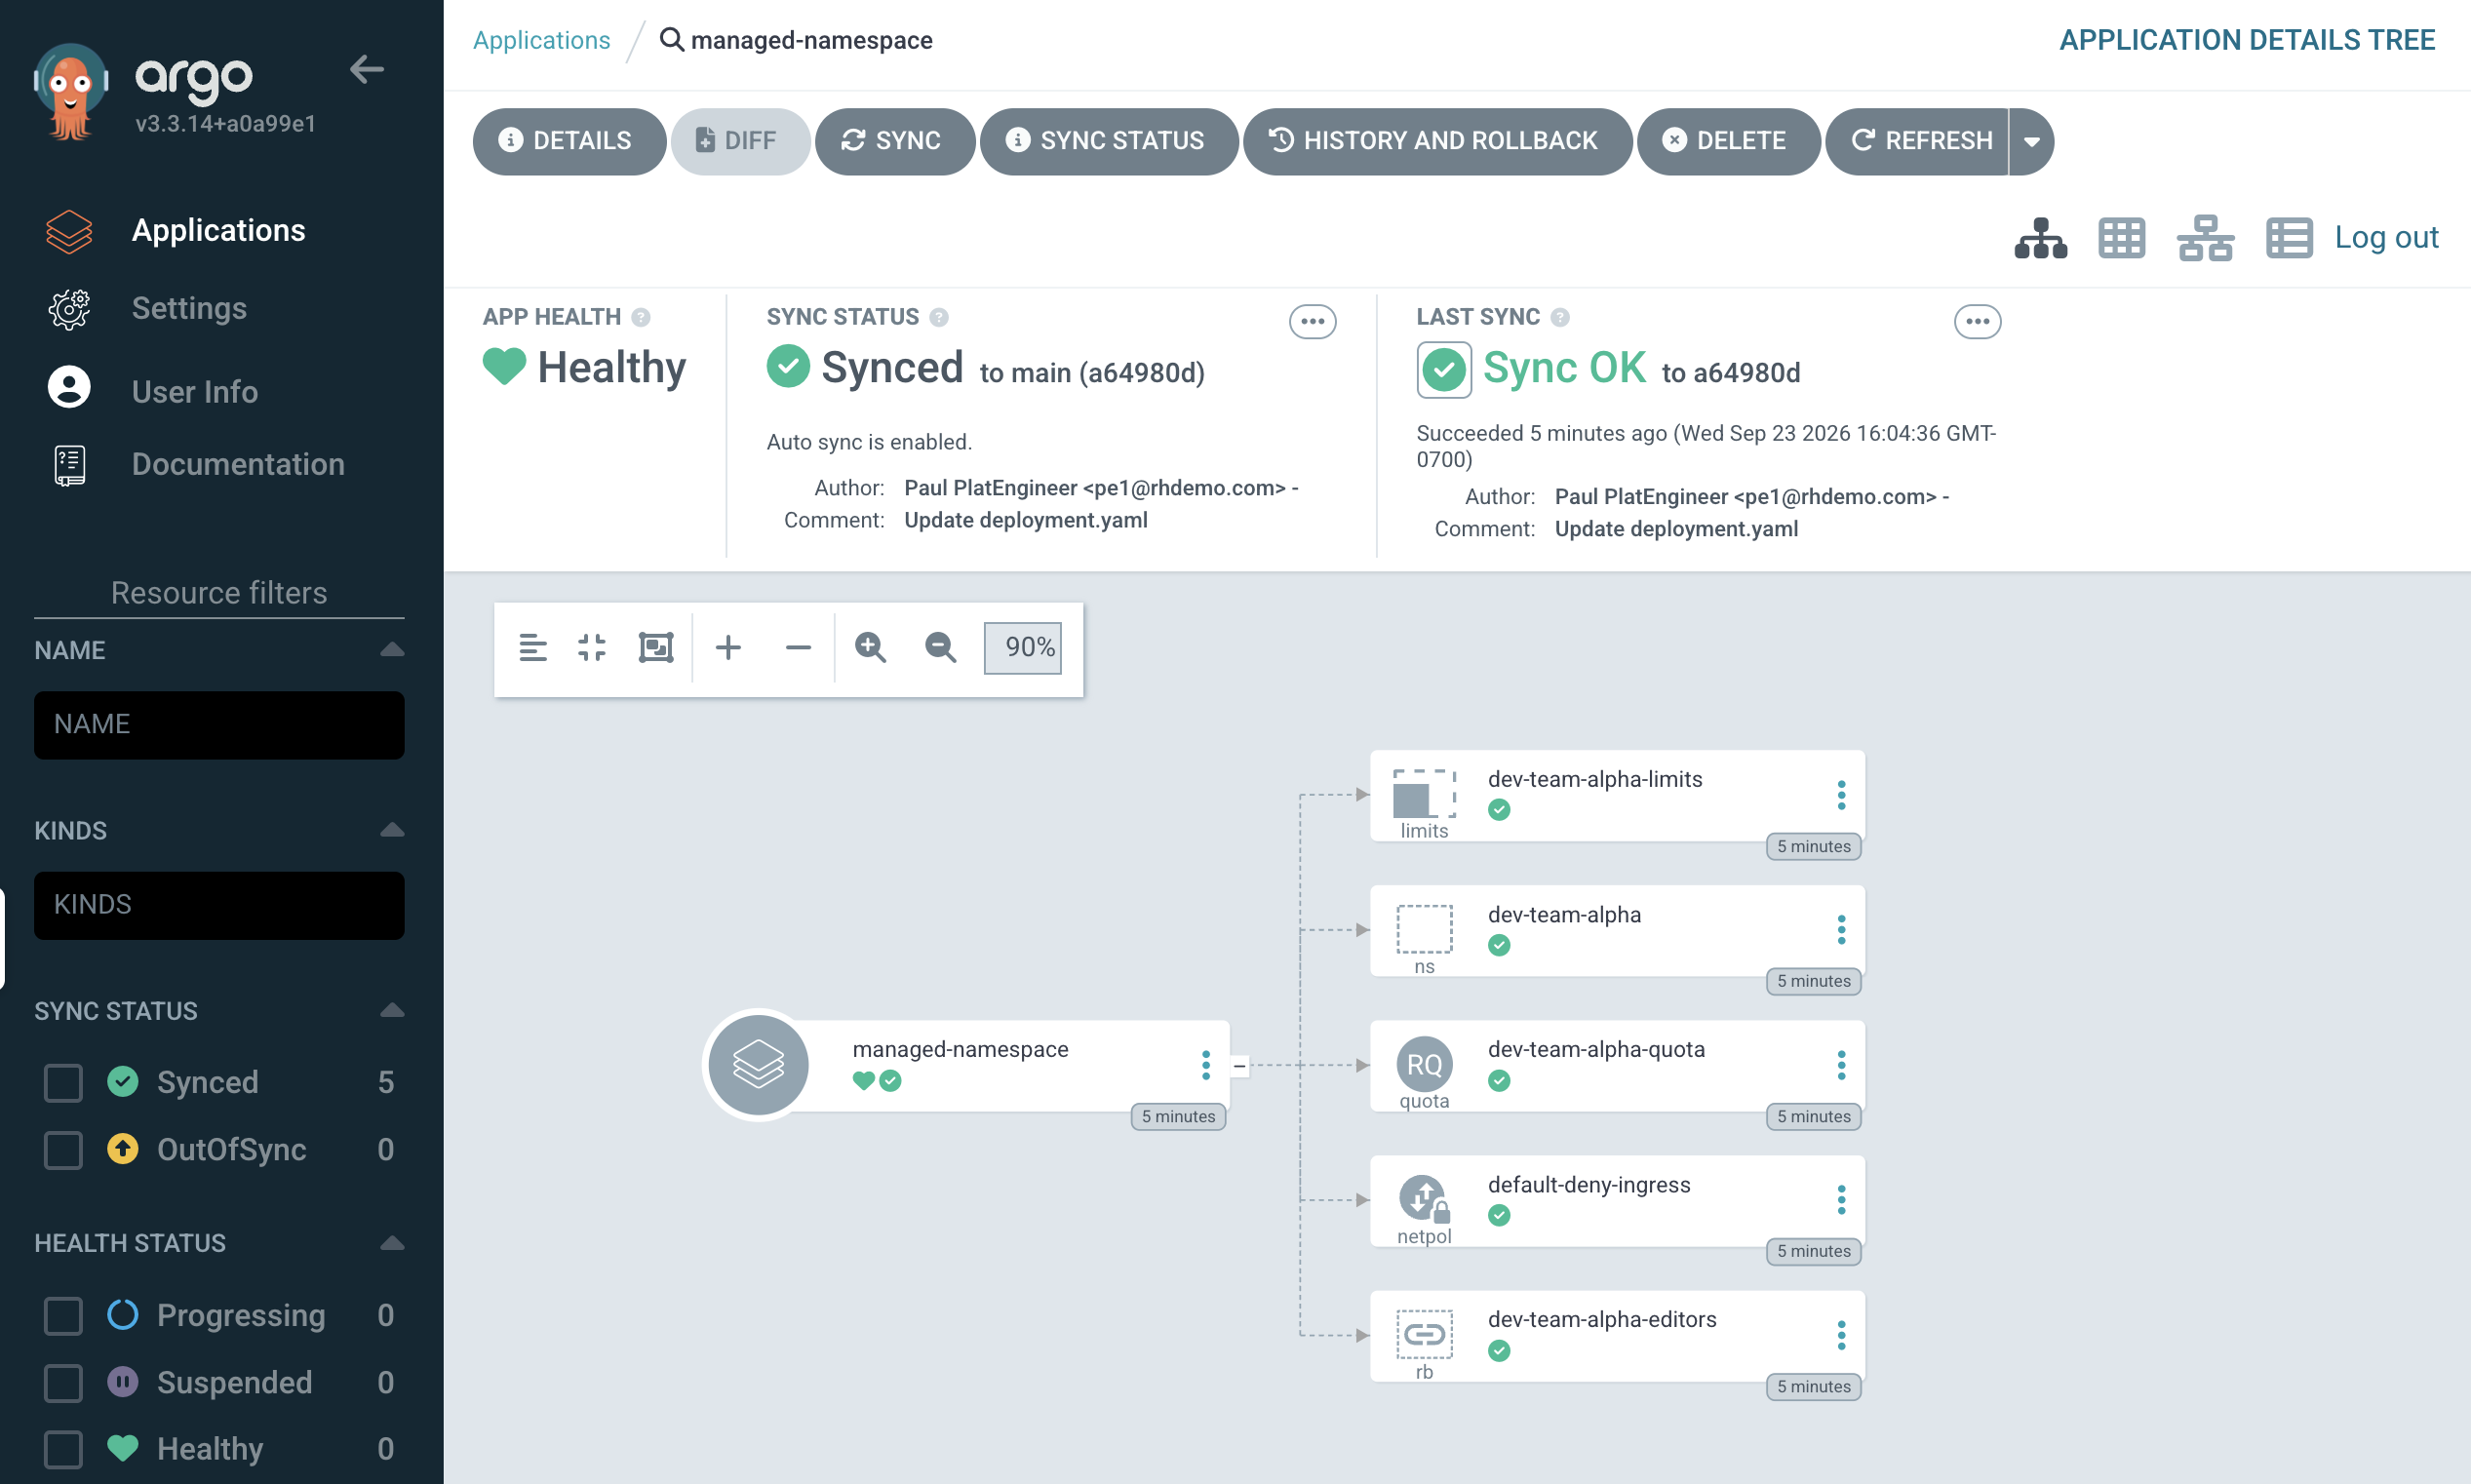
This time you are using automatedsync withselfHeal: true. The platform team wants the namespace configuration to be continuously enforced — if someone manually removes the quota or network policy, Argo CD will restore it. -
Verify the Application is synced:
oc get application managed-namespace -n openshift-gitopsThe
SYNC STATUSshould showSyncedandHEALTH STATUSshould showHealthy. -
Confirm the resources were created:
oc get resourcequota,limitrange,rolebinding,networkpolicy -n dev-team-alphaYou should see all five resources in place.
Exercise 3: See it from a developer’s perspective
You’ve provisioned the namespace as a platform engineer. Now you will switch to the dev1 user to see what the experience looks like from the other side — using the OpenShift web console instead of the CLI.
-
Open a private/incognito browser window and navigate to the OpenShift Web Console using this URL:
https://console-openshift-console.%openshift_cluster_ingress_domain% -
Log in as
dev1using the developers identity provider:-
Username:
dev1 -
Password:
{common_password}
-
-
Once logged in, you should see your Projects list. You should only see
dev-team-alphaandparasolrelated Projects — novault,openshift-gitops,rhdh, or any other infrastructure namespace. The new RoleBinding scopeddev1anddev2to thedev-team-alpha- this is why you can see it. -
Select the
dev-team-alphaproject and navigate to Administration > ResourceQuotas using the left side menu.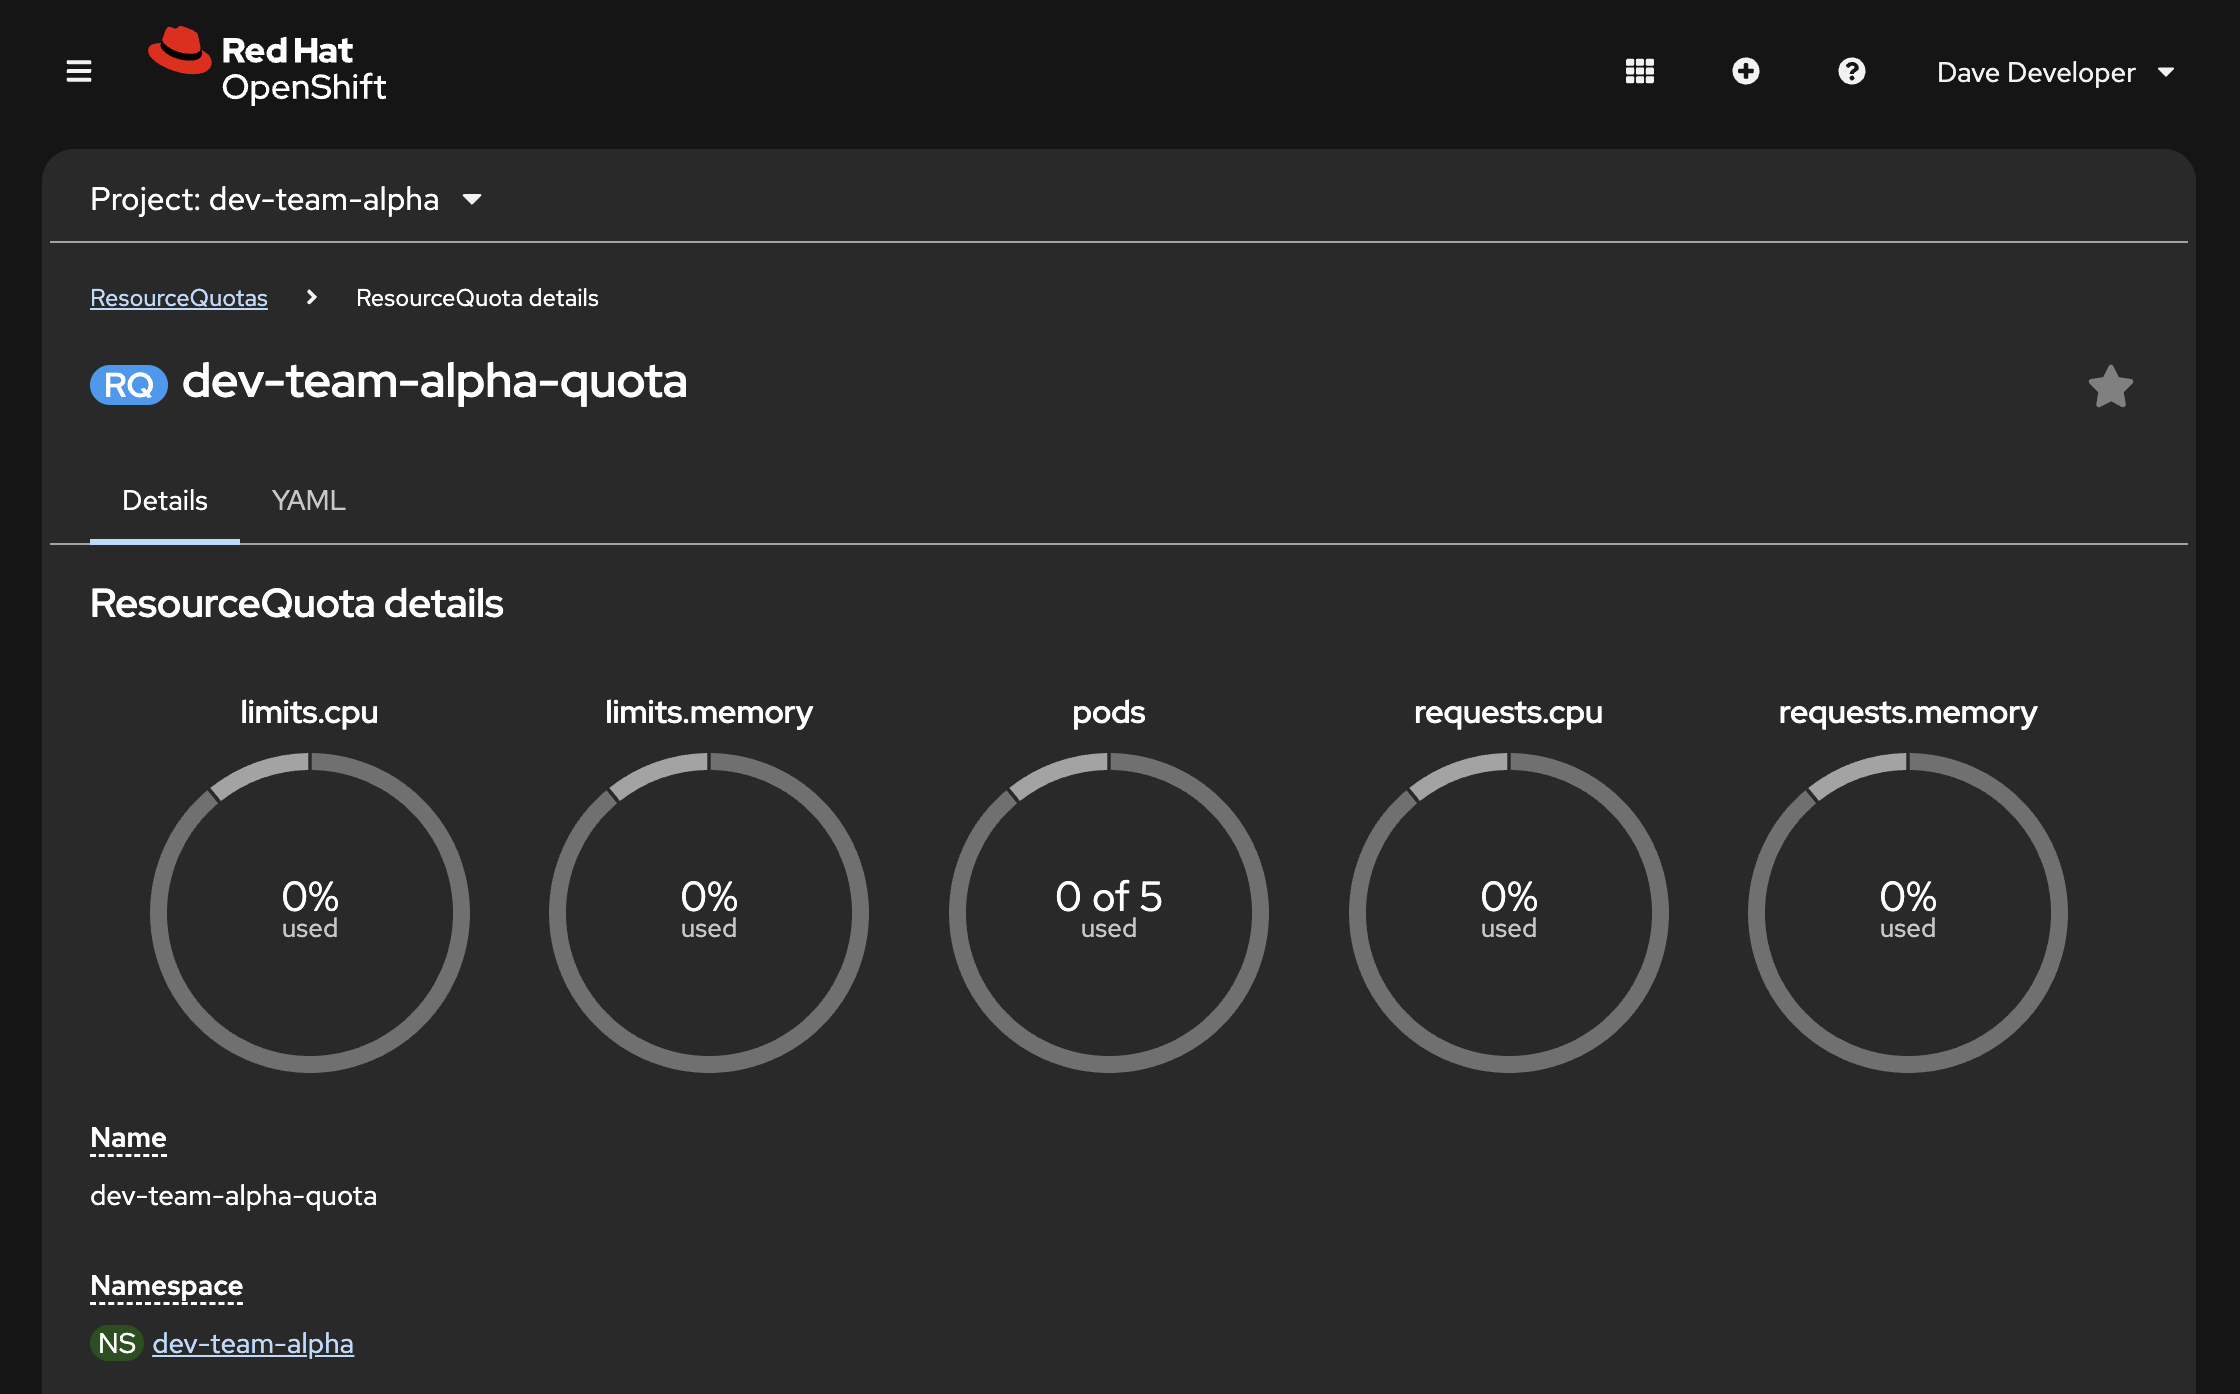 Figure 3. The ResourceQuota usage for the dev-team-alpha Namespace
You will see the
dev-team-alpha-quota. Click it, scroll down, and note the limits the platform team defined: 5 pods, 512Mi total memory requests, and 1Gi total memory limits. The Used column shows current consumption. -
Navigate to Administration > LimitRanges
You will see
dev-team-alpha-limitswith the per-container maximums and defaults. Any pod a developer creates in this namespace will be constrained by these limits.
As a developer, you can see the guardrails — you know how much headroom you have before you hit them.
Exercise 4: Hit the guardrails
Stay in the private browser window as dev1. You will use the OpenShift console’s built-in YAML editor to try deploying pods — the same way a developer might work day-to-day.
-
Make sure the
dev-team-alphaproject is selected in the Project dropdown -
Click the + (Import YAML) icon in the top navigation bar
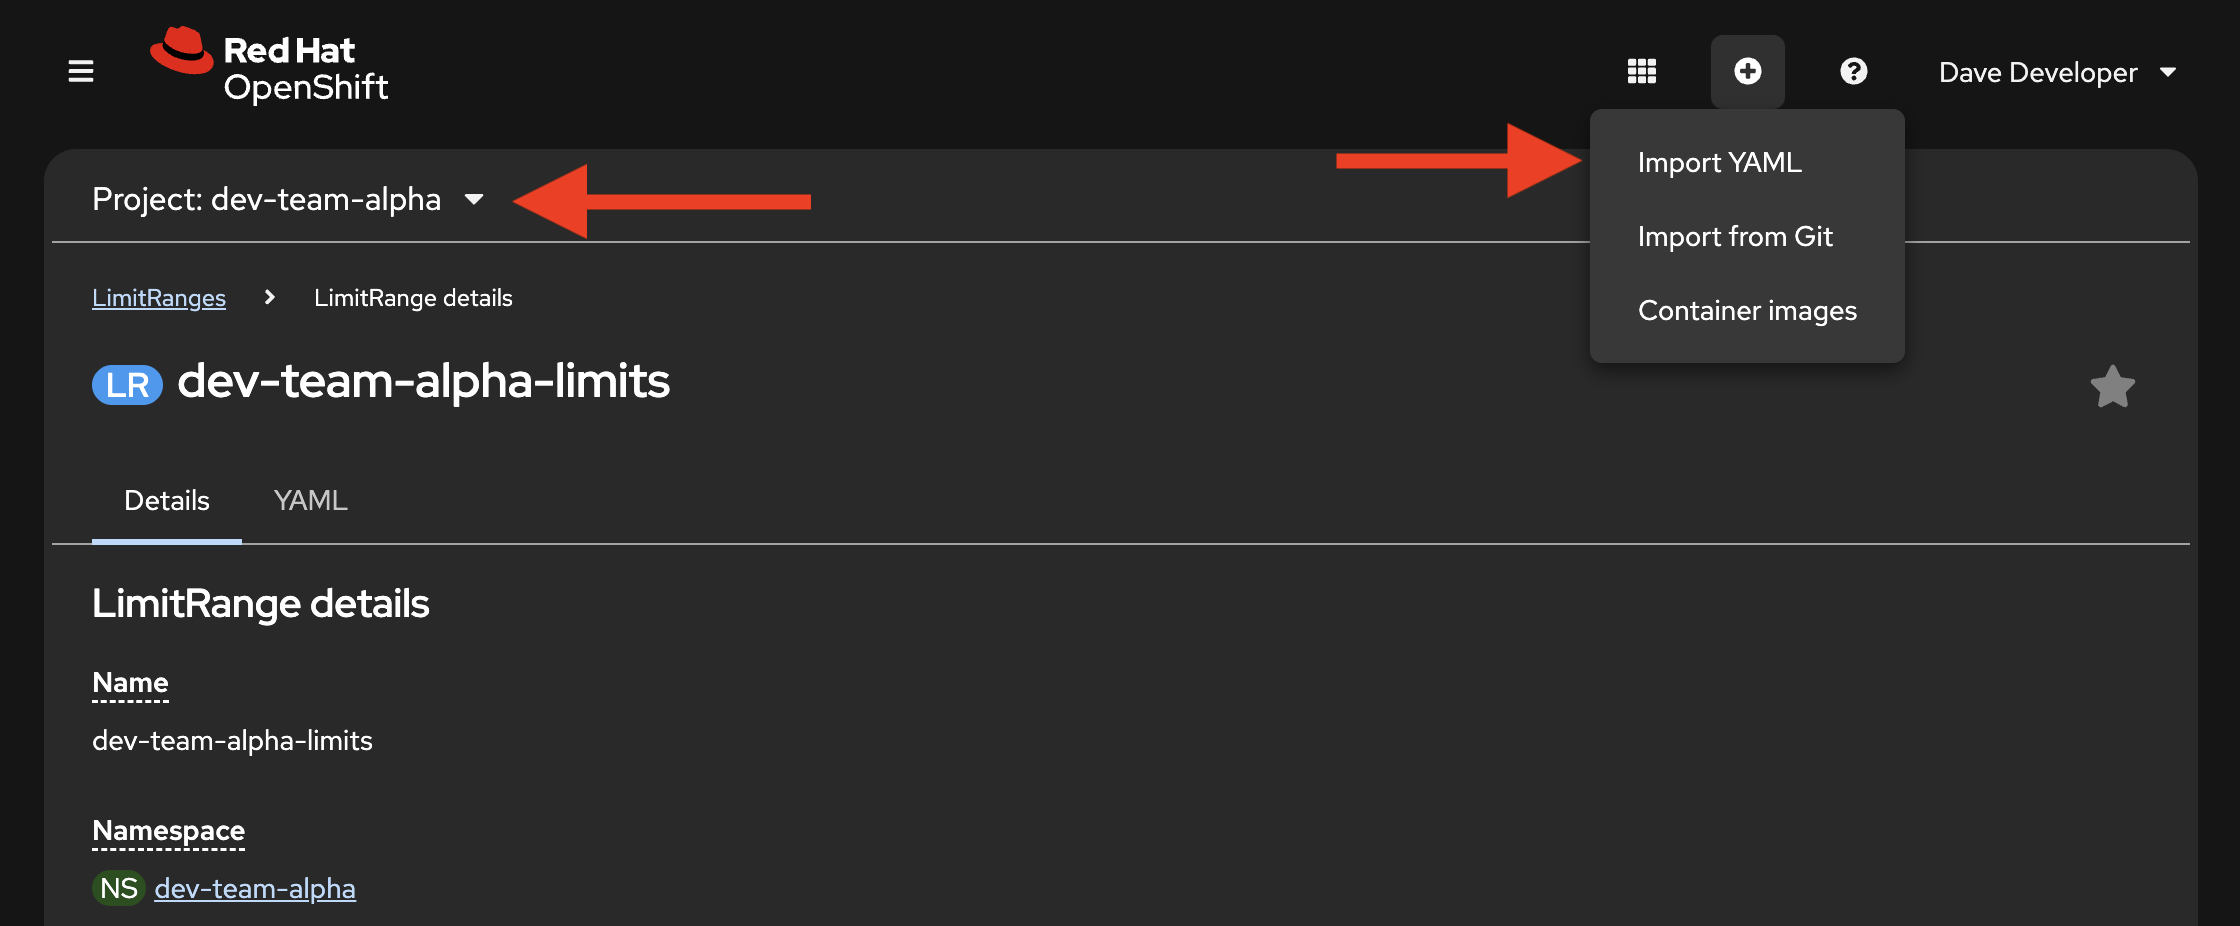 Figure 4. Find the Import YAML link in OpenShift’s Web Console
 -
Paste the following pod definition — it requests 512Mi of memory, which is double the per-container maximum of 256Mi:
apiVersion: v1 kind: Pod metadata: name: greedy-pod namespace: dev-team-alpha spec: containers: - name: httpd image: registry.access.redhat.com/ubi9/httpd-24:latest resources: requests: memory: 512Mi limits: memory: 512Mi -
Click Create
The request is rejected. You will see an error similar to:
maximum memory usage per Container is 256Mi, but limit is 512Mi
The LimitRange prevented a single container from consuming more than its allowed share.
-
Clear the editor and paste a corrected pod that fits within the limits:
apiVersion: v1 kind: Pod metadata: name: good-pod namespace: dev-team-alpha spec: containers: - name: httpd image: registry.access.redhat.com/ubi9/httpd-24:latest resources: requests: memory: 128Mi limits: memory: 256Mi -
Click Create — this time it succeeds.
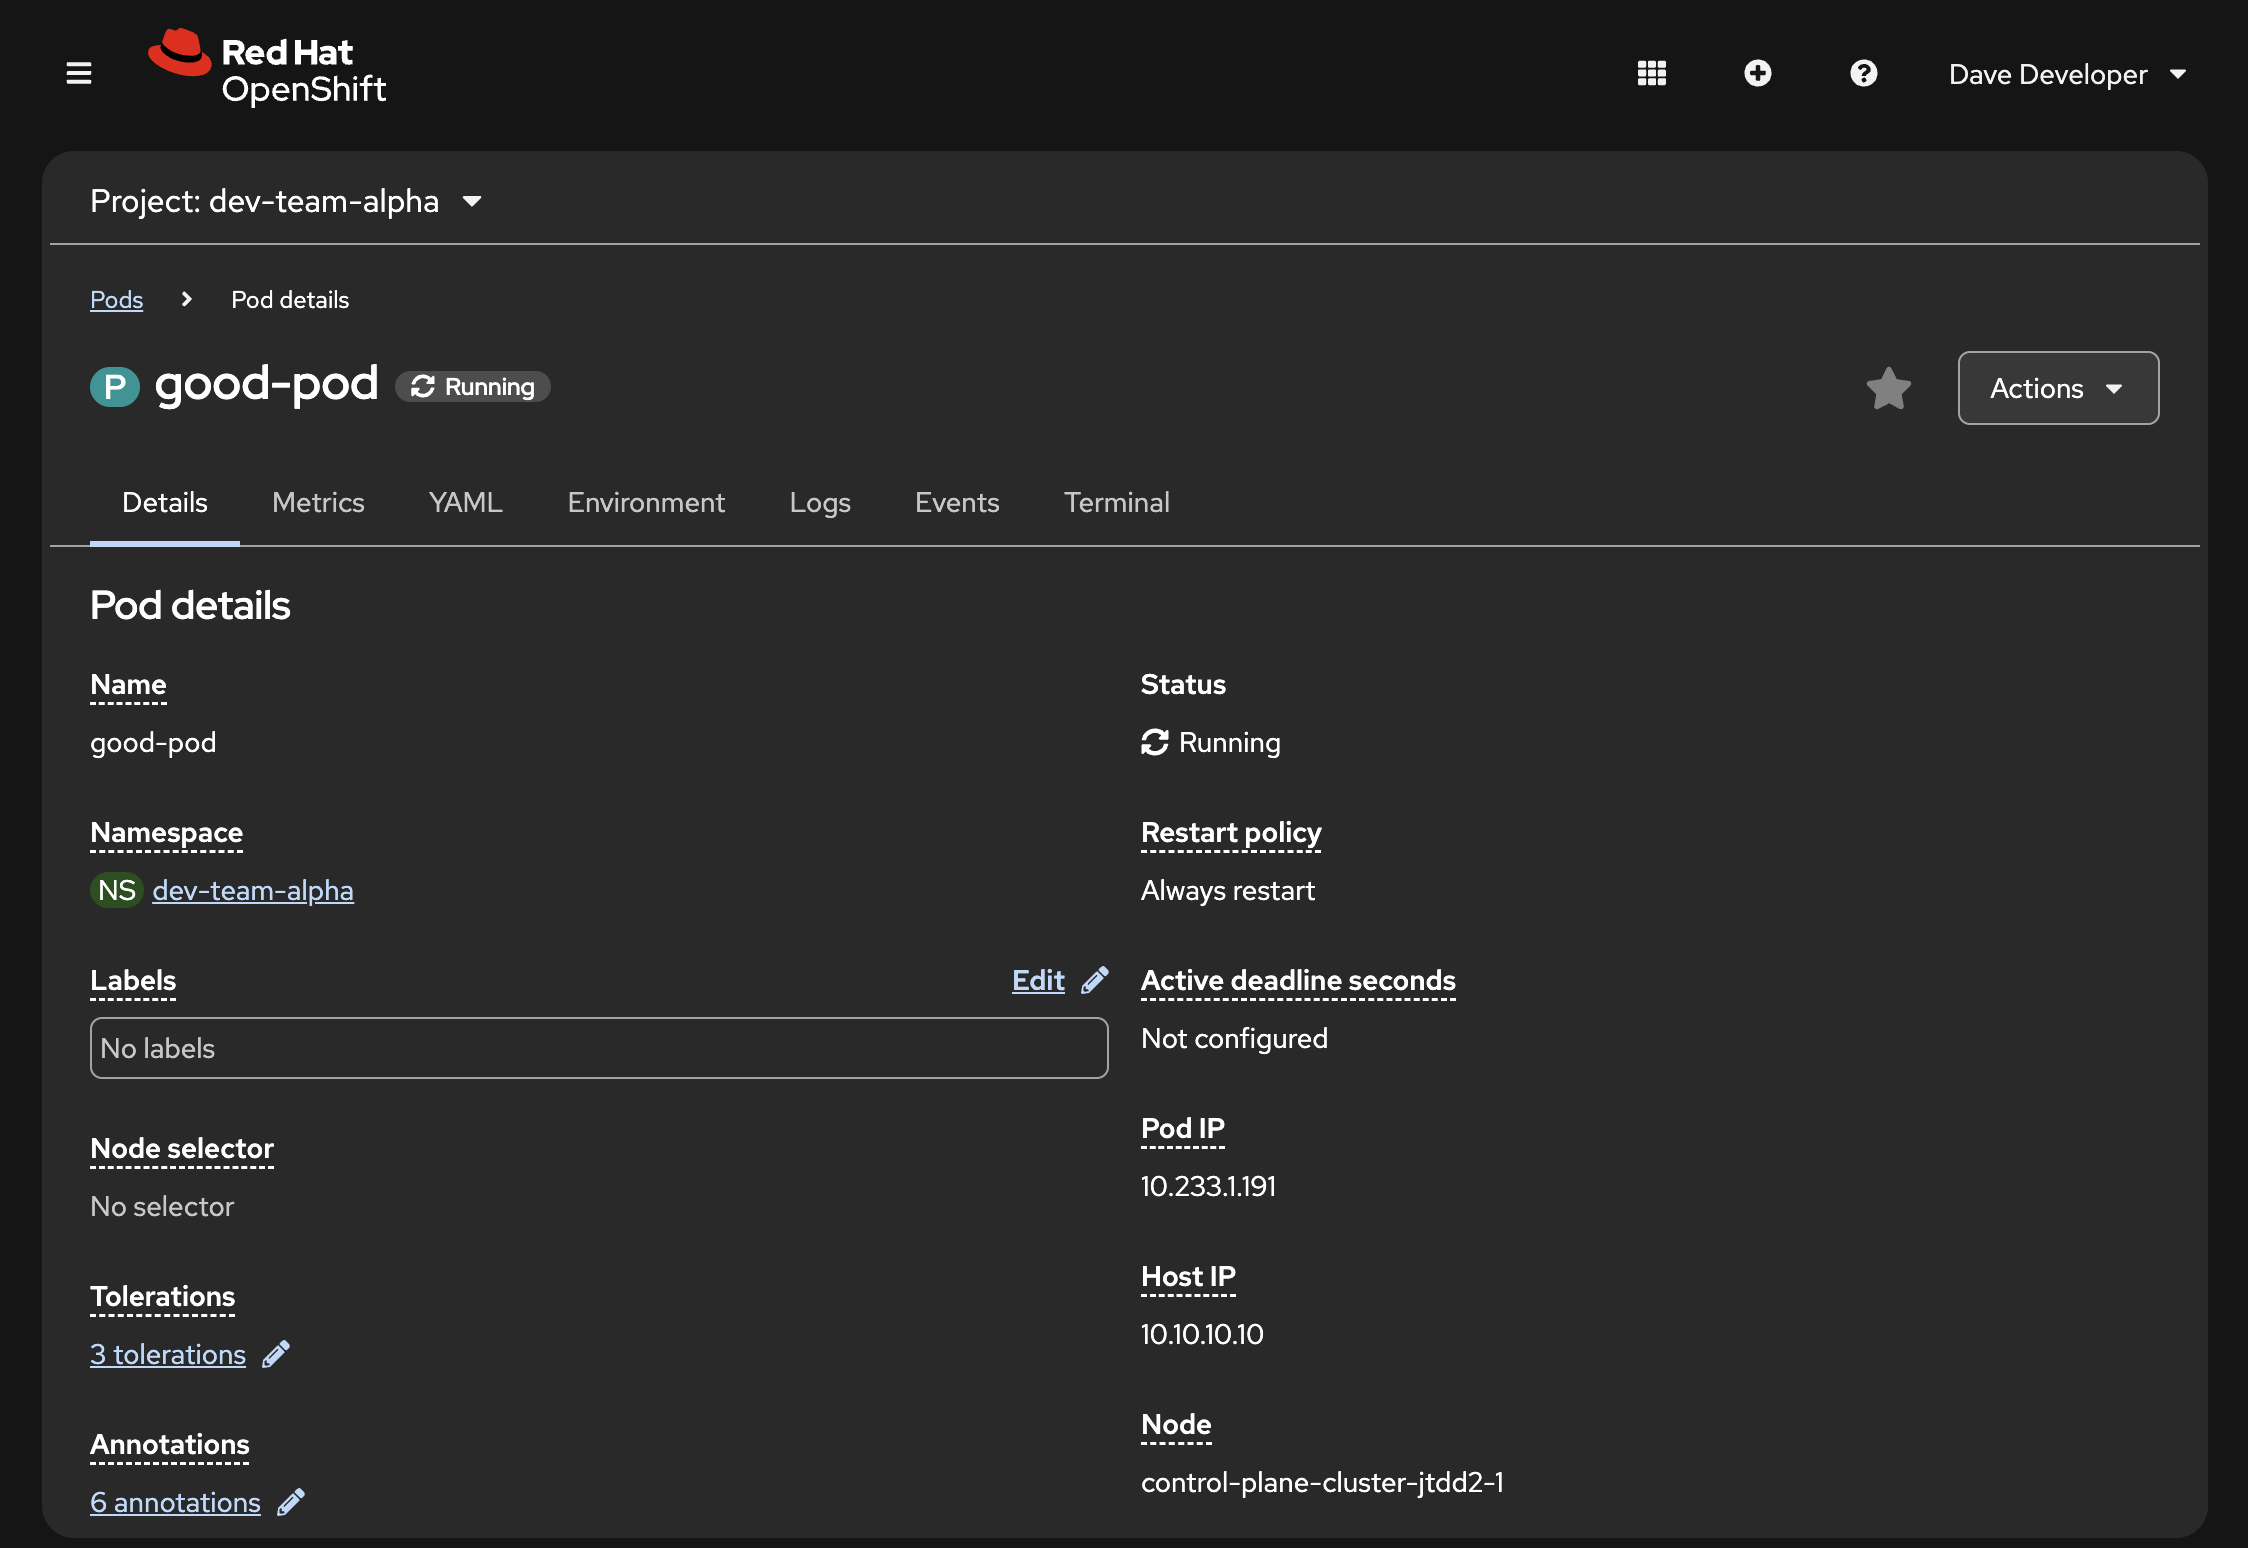 Figure 5. Pod’s that stay within the defined LimitRange(s) are created
 -
Navigate to Workloads > Pods to confirm
good-podis in aRunningstate. The developer got their workload deployed — they just had to stay within the guardrails the platform team defined. -
Go back to Administration > ResourceQuotas and click on
dev-team-alpha-quota. The Used column now reflects the resources consumed by the pod. The platform team can monitor this to understand how close teams are to their limits.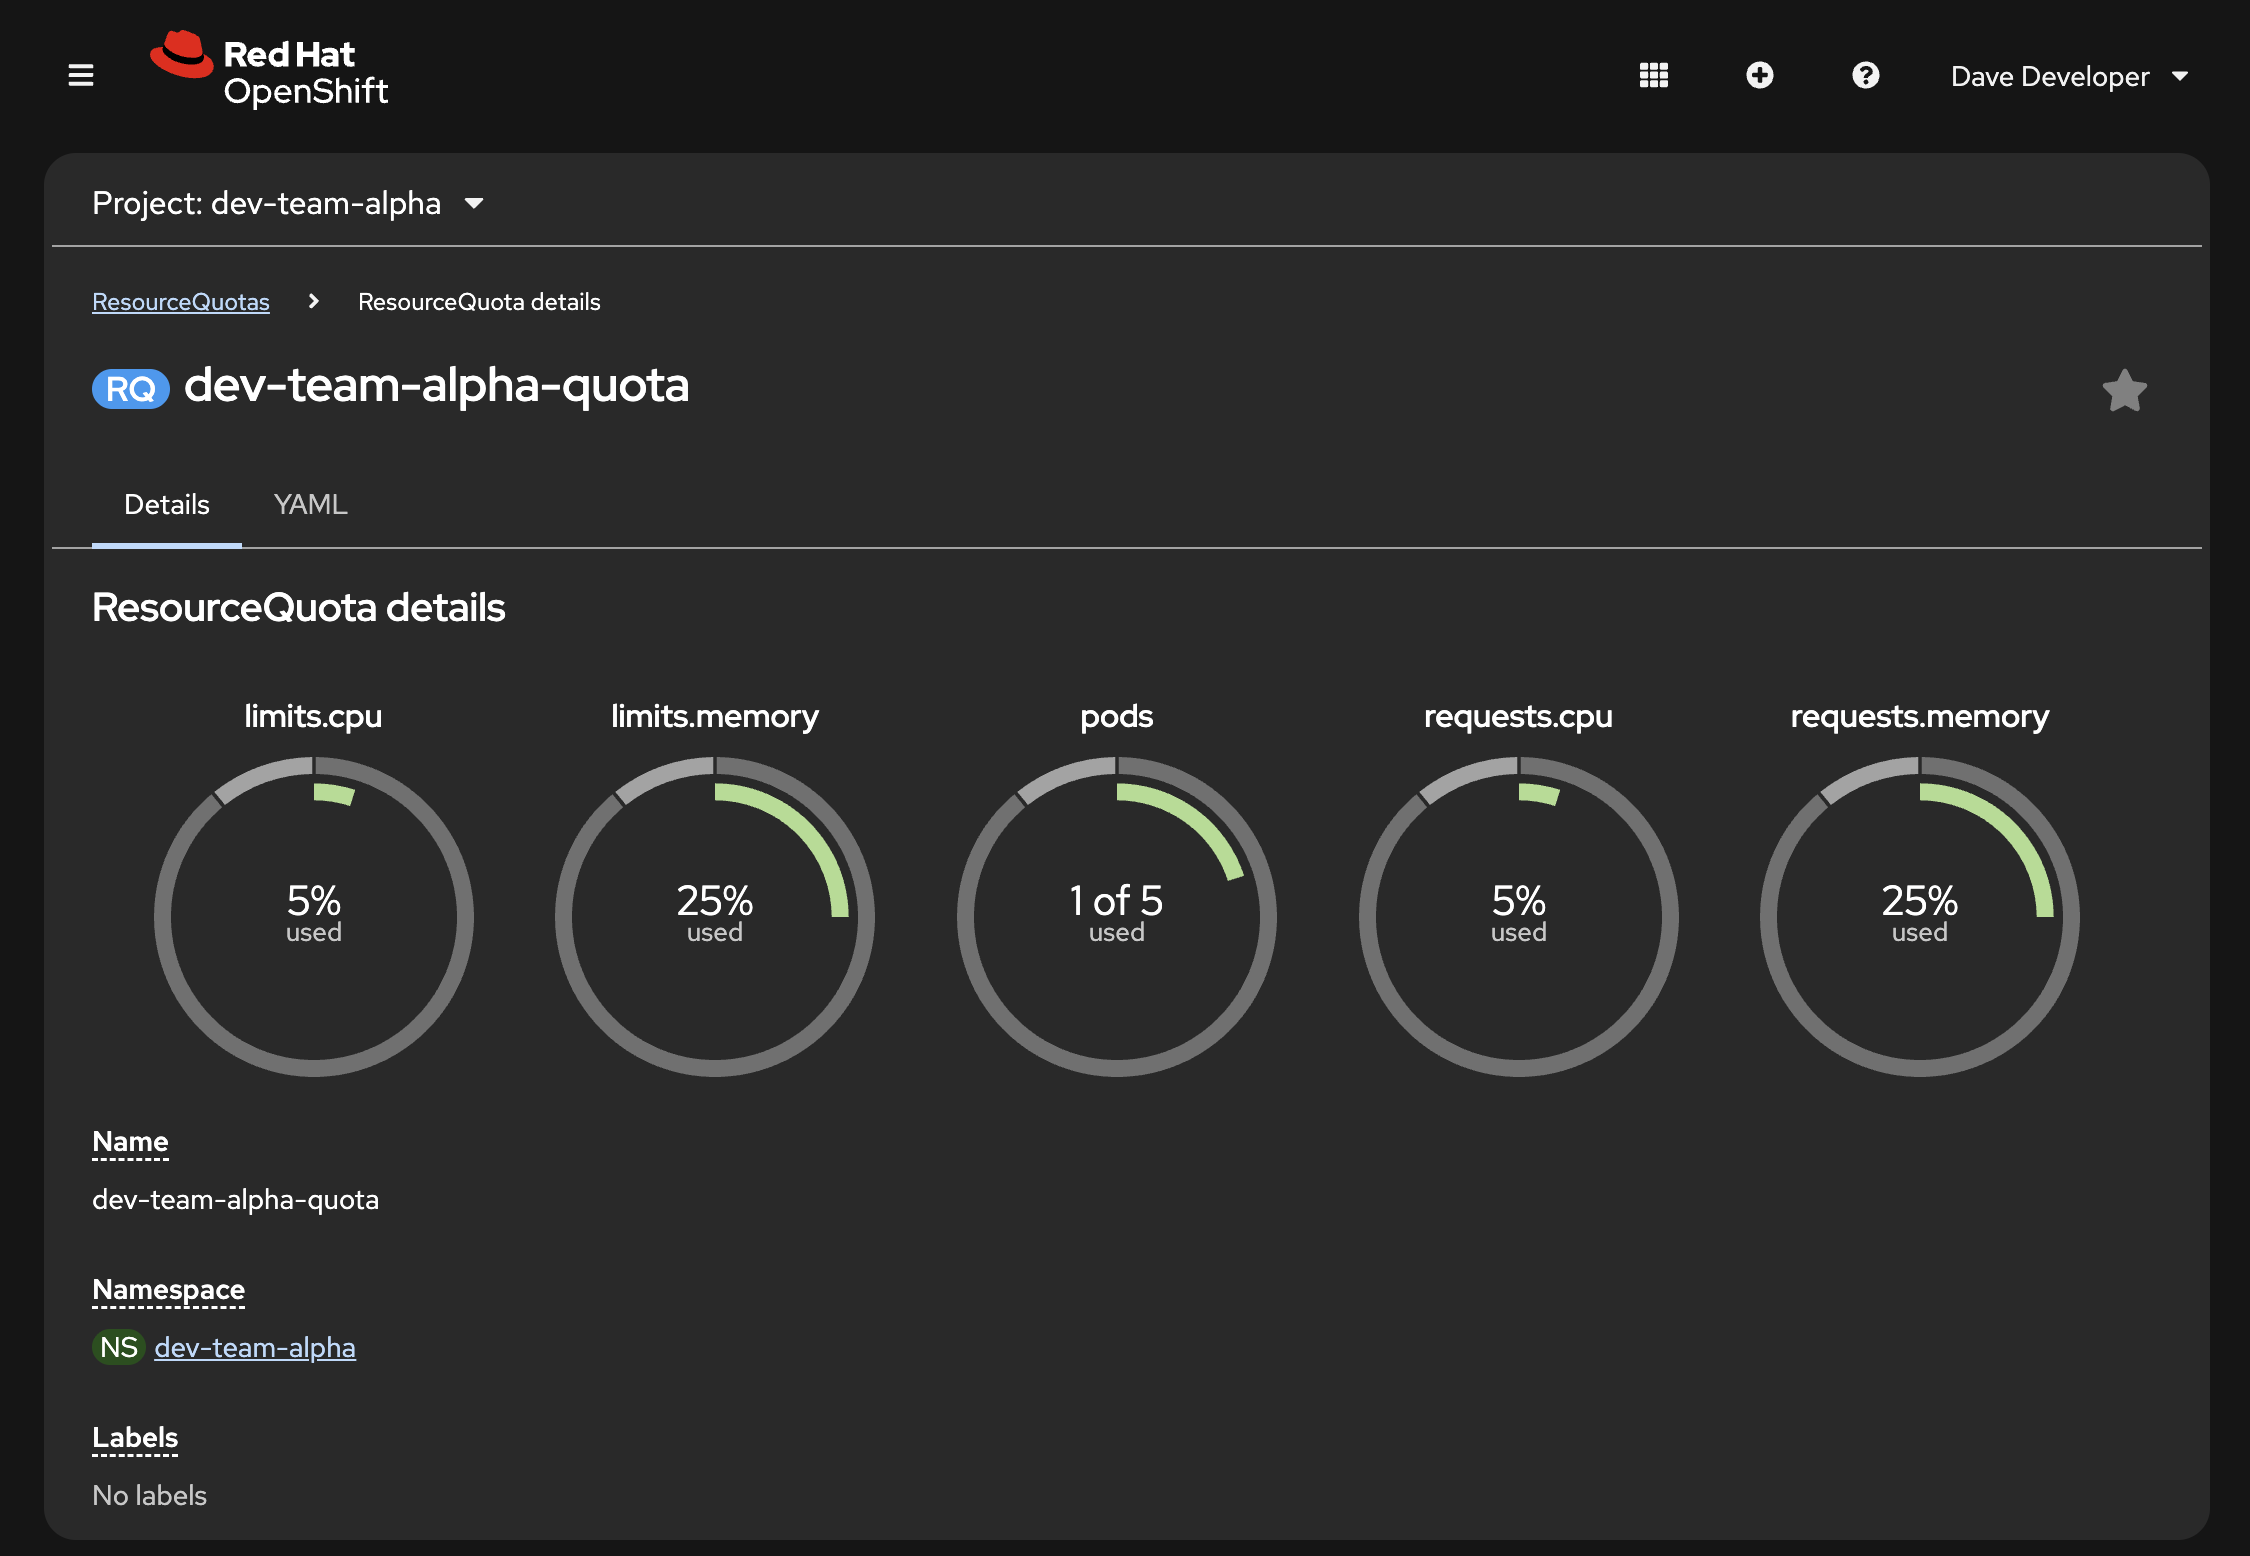 Figure 6. ResourceQuota page reflecting new usage by the Pod
You can now close the private browser window.
Clean up
Remove the managed namespace Application.
oc delete application managed-namespace -n openshift-gitops
The oc delete command will take a moment to complete. This is because it waits for Argo CD to delete the underlying resources.
|
Verify the namespace and all its resources are gone:
oc get namespace dev-team-alphaYou should see Error from server (NotFound). Argo CD cleaned up everything it managed — the namespace, quota, limit range, role binding, network policy, and any pods the developer created within it.
Module summary
You provisioned a managed namespace with resource guardrails, access controls, and network isolation — then experienced those guardrails from a developer’s perspective.
What you accomplished:
-
Deployed a complete managed namespace using an Argo CD Application applied via
oc -
Logged into the OpenShift console as a developer and confirmed scoped access
-
Attempted to exceed resource limits and observed the rejection
-
Fixed the resource request and deployed successfully within the guardrails
Key takeaway: A namespace is more than a name — it’s a product the platform team delivers to development teams. ResourceQuotas, LimitRanges, RoleBindings, and NetworkPolicies work together to create a safe, isolated, self-service environment. Today you provisioned this by creating manifests manually. Later, you will see how Developer Hub templates can automate this entire process for every new team.
Next steps: Next, you will deploy Developer Hub itself — the portal that ties all of these platform capabilities together behind a self-service interface.