Activity: Configure OpenID Connect Authentication
Red Hat Developer Hub supports four authentication providers:
-
Guest (suitable for experimentation and demos only)
-
OpenID Connect
-
GitHub
-
Microsoft Azure
In this activity you’ll configure an OpenID Connect authentication provider - this will enable developers within your organization to login using their single sign-on (SSO) credentials.
High-Level Workflow
A complete set of documentation for configuring OpenID Connect authentication using Red Hat Single Sign-On is available in the Red Hat Developer Hub documentation.
| Don’t worry if some of the following bullet points are hard to understand upon first reading them. You’ll be guided through each piece step-by-step. |
The high-level steps involve:
-
Creating a Realm and Client in Red Hat Single Sign-On. These have been pre-configured for you. View the
backstageRealm using the following URL and credentials:-
Credentials: View on OpenShift. (If needed, login to OpenShift as
admin/{common_password})
-
Configuring the Red Hat Developer Hub Keycloak plugin to synchronize users from Red Hat Single Sign-On to Red Hat Developer Hub.
-
Configuring the
oidcRed Hat Developer Hub authentication provider with the Realm details. -
Setting
oidcassignInPagepage type for Red Hat Developer Hub. -
Enabling session support in Red Hat Developer Hub.
Configure the OpenID Connect Authentication Provider
-
Visit your rhdh/developer-hub-config repository on GitLab.
-
Open the values.yaml file, then select Edit > Edit single file.
-
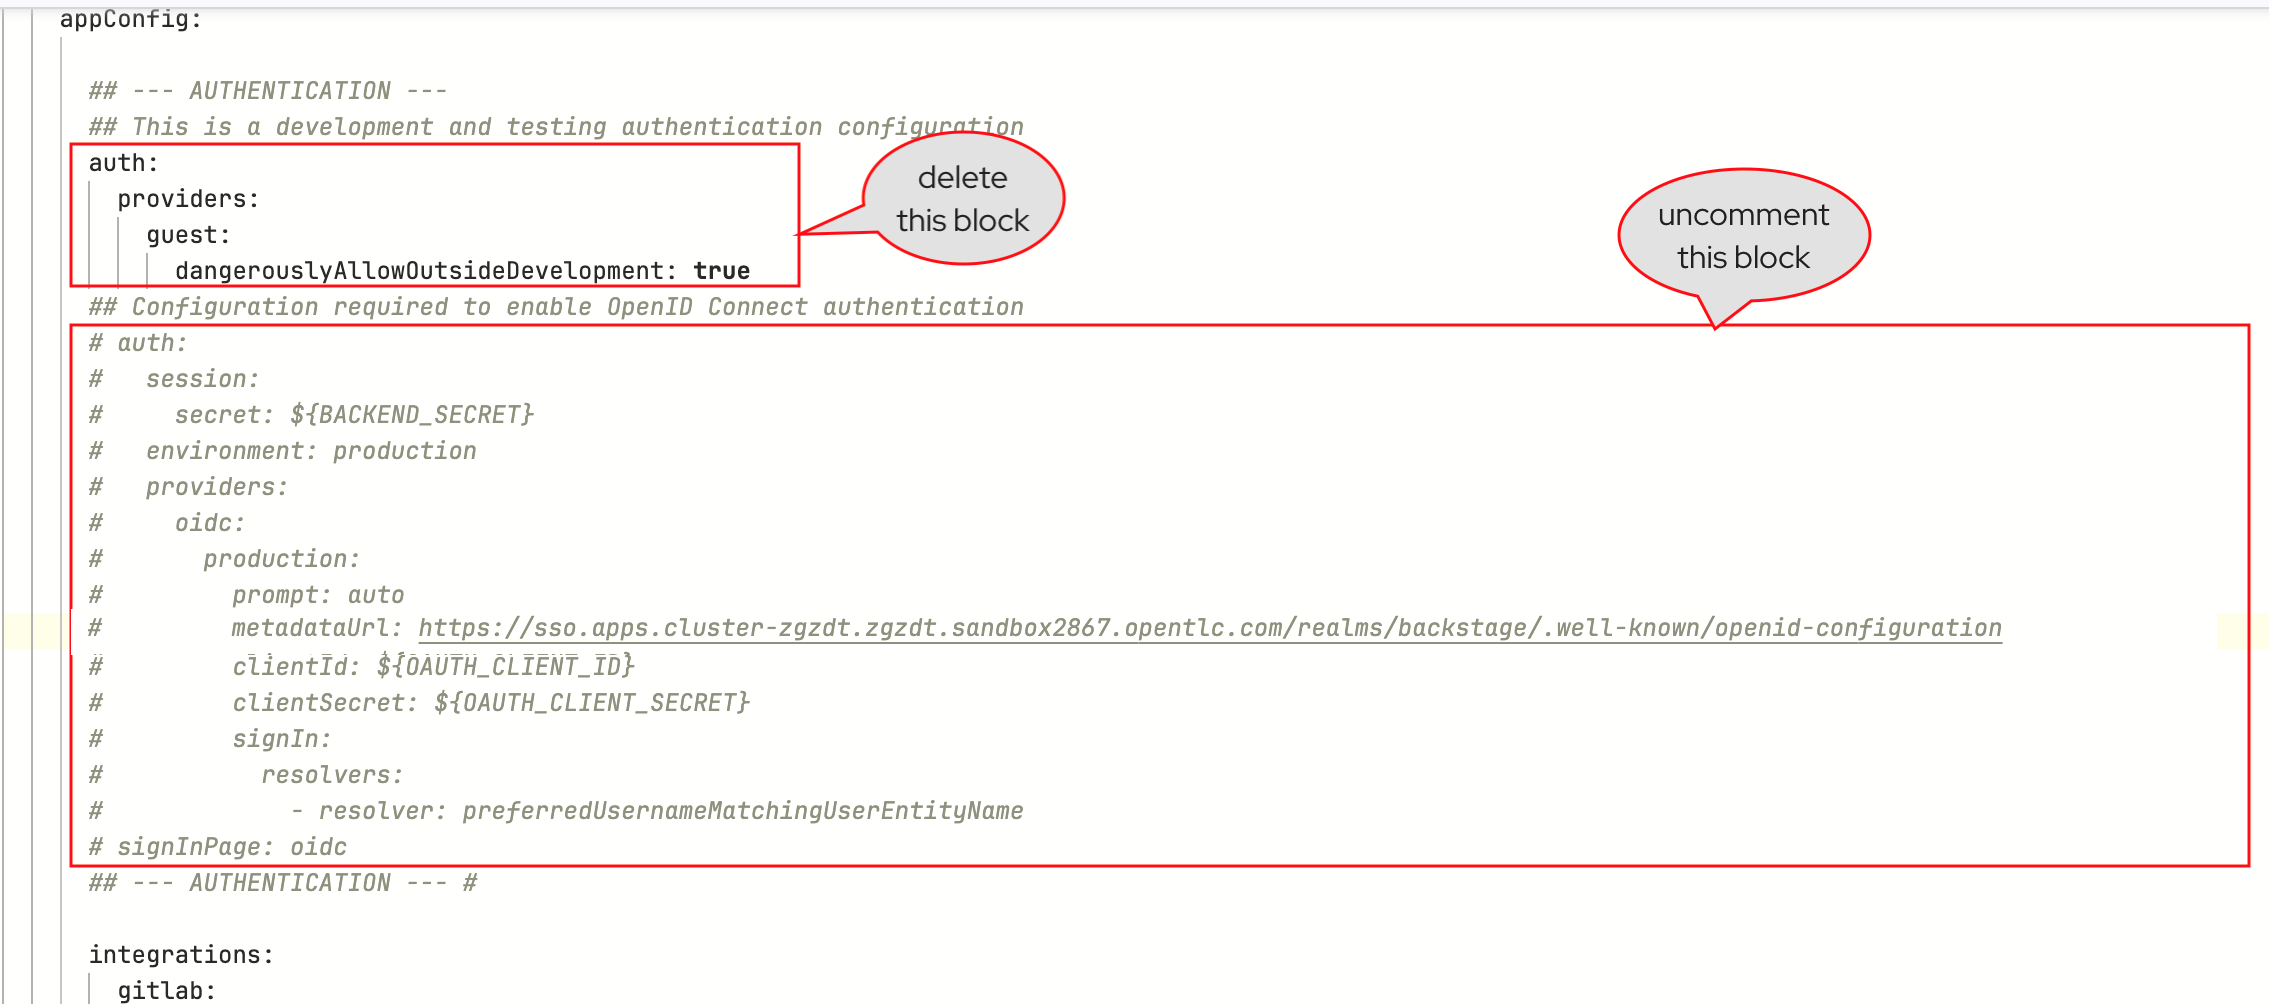
Locate the
appConfig.authobject in the YAML. You can search for--- AUTHENTICATION ---in this file to locate this section. -
Delete the existing
authconfiguration that contains theguestprovider. -
Uncomment the entire
authconfiguration containing theoidcprovider, and thesignInPagesetting below it.
-
The end result will look similar to:
auth: session: secret: ${BACKEND_SECRET} environment: production providers: oidc: production: prompt: auto metadataUrl: https://sso.{openshift_cluster_ingress_domain}/realms/backstage/.well-known/openid-configuration clientId: ${OAUTH_CLIENT_ID} clientSecret: ${OAUTH_CLIENT_SECRET} signIn: resolvers: - resolver: preferredUsernameMatchingUserEntityName signInPage: oidc -
This is an example standard Backstage
authconfiguration. Below is a summary of what this configuration specifies:-
Enable sessions, and use the
BACKEND_SECRETenvironment variable to sign sessions. -
Set the authentication
environmenttoproduction. Environments can have any arbitrary name. -
Enable the OpenID Connect provider (
providers.oidc) with the following configuration:-
Provide a
productionconfiguration (corresponding to theenvironmentdefined previously). -
Use the
backstageRealm (metadataUrl). -
Load the
clientIdandclientSecretfrom environment variables (loaded from the precreated oauth-client Secret, specified inextraEnvVarsSecretsin the values.yaml) -
Map any signing in user identity to a User Entity in Red Hat Developer Hub using the specified resolver. These Users and Groups have already been synchronised to the catalog due to your work in the prior module.
-
-
The
signInPageproperty is specific to Red Hat Developer Hub. It ensures the correct sign-in UI is rendered. In upstream Backstage this requires React code changes.
-
-
Commit the changes with a message similar to
feat: enable openid connect -
Click Refresh on the
backstageApplication in OpenShift GitOps. If prompted, login asadmin/{openshift_gitops_password}. -
Wait until the Application reports being in a Healthy state.
Login using OpenID Connect Authentication
-
Once the latest version of your
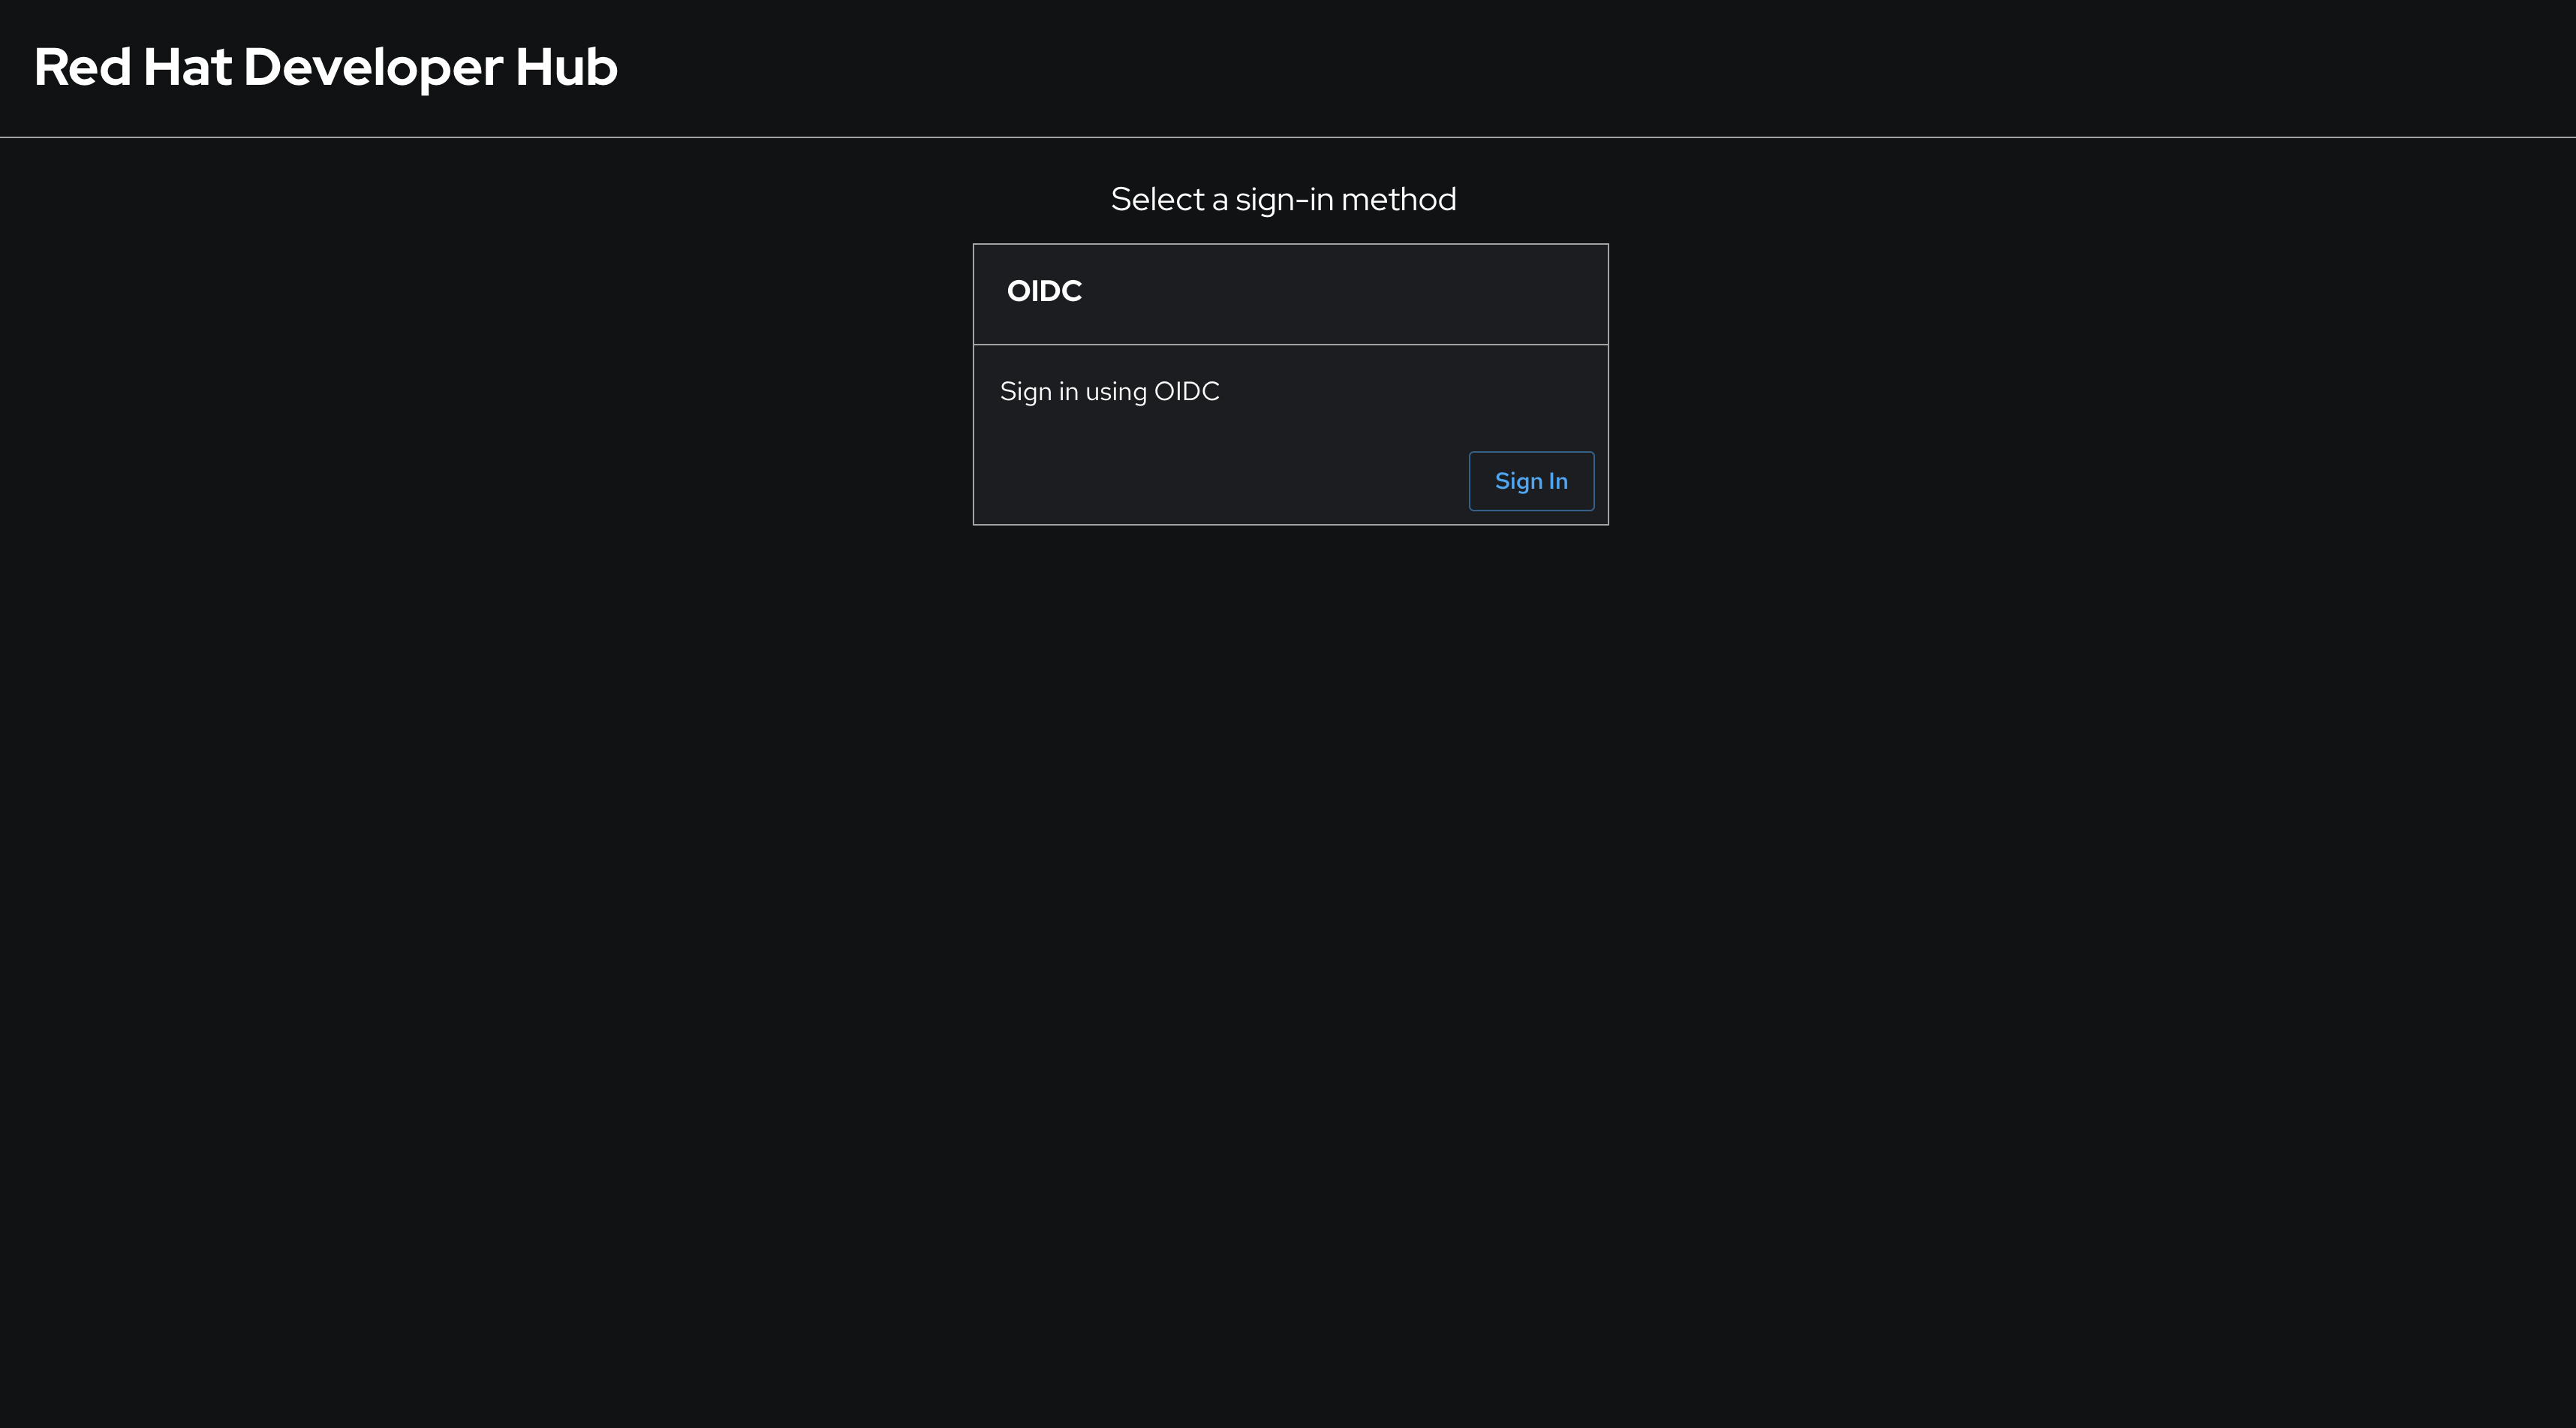
appConfighas been synchronized and rolled out, visit your Red Hat Developer Hub instance. You will be prompted to sign-in using OpenID Connect.
-
Login using the username
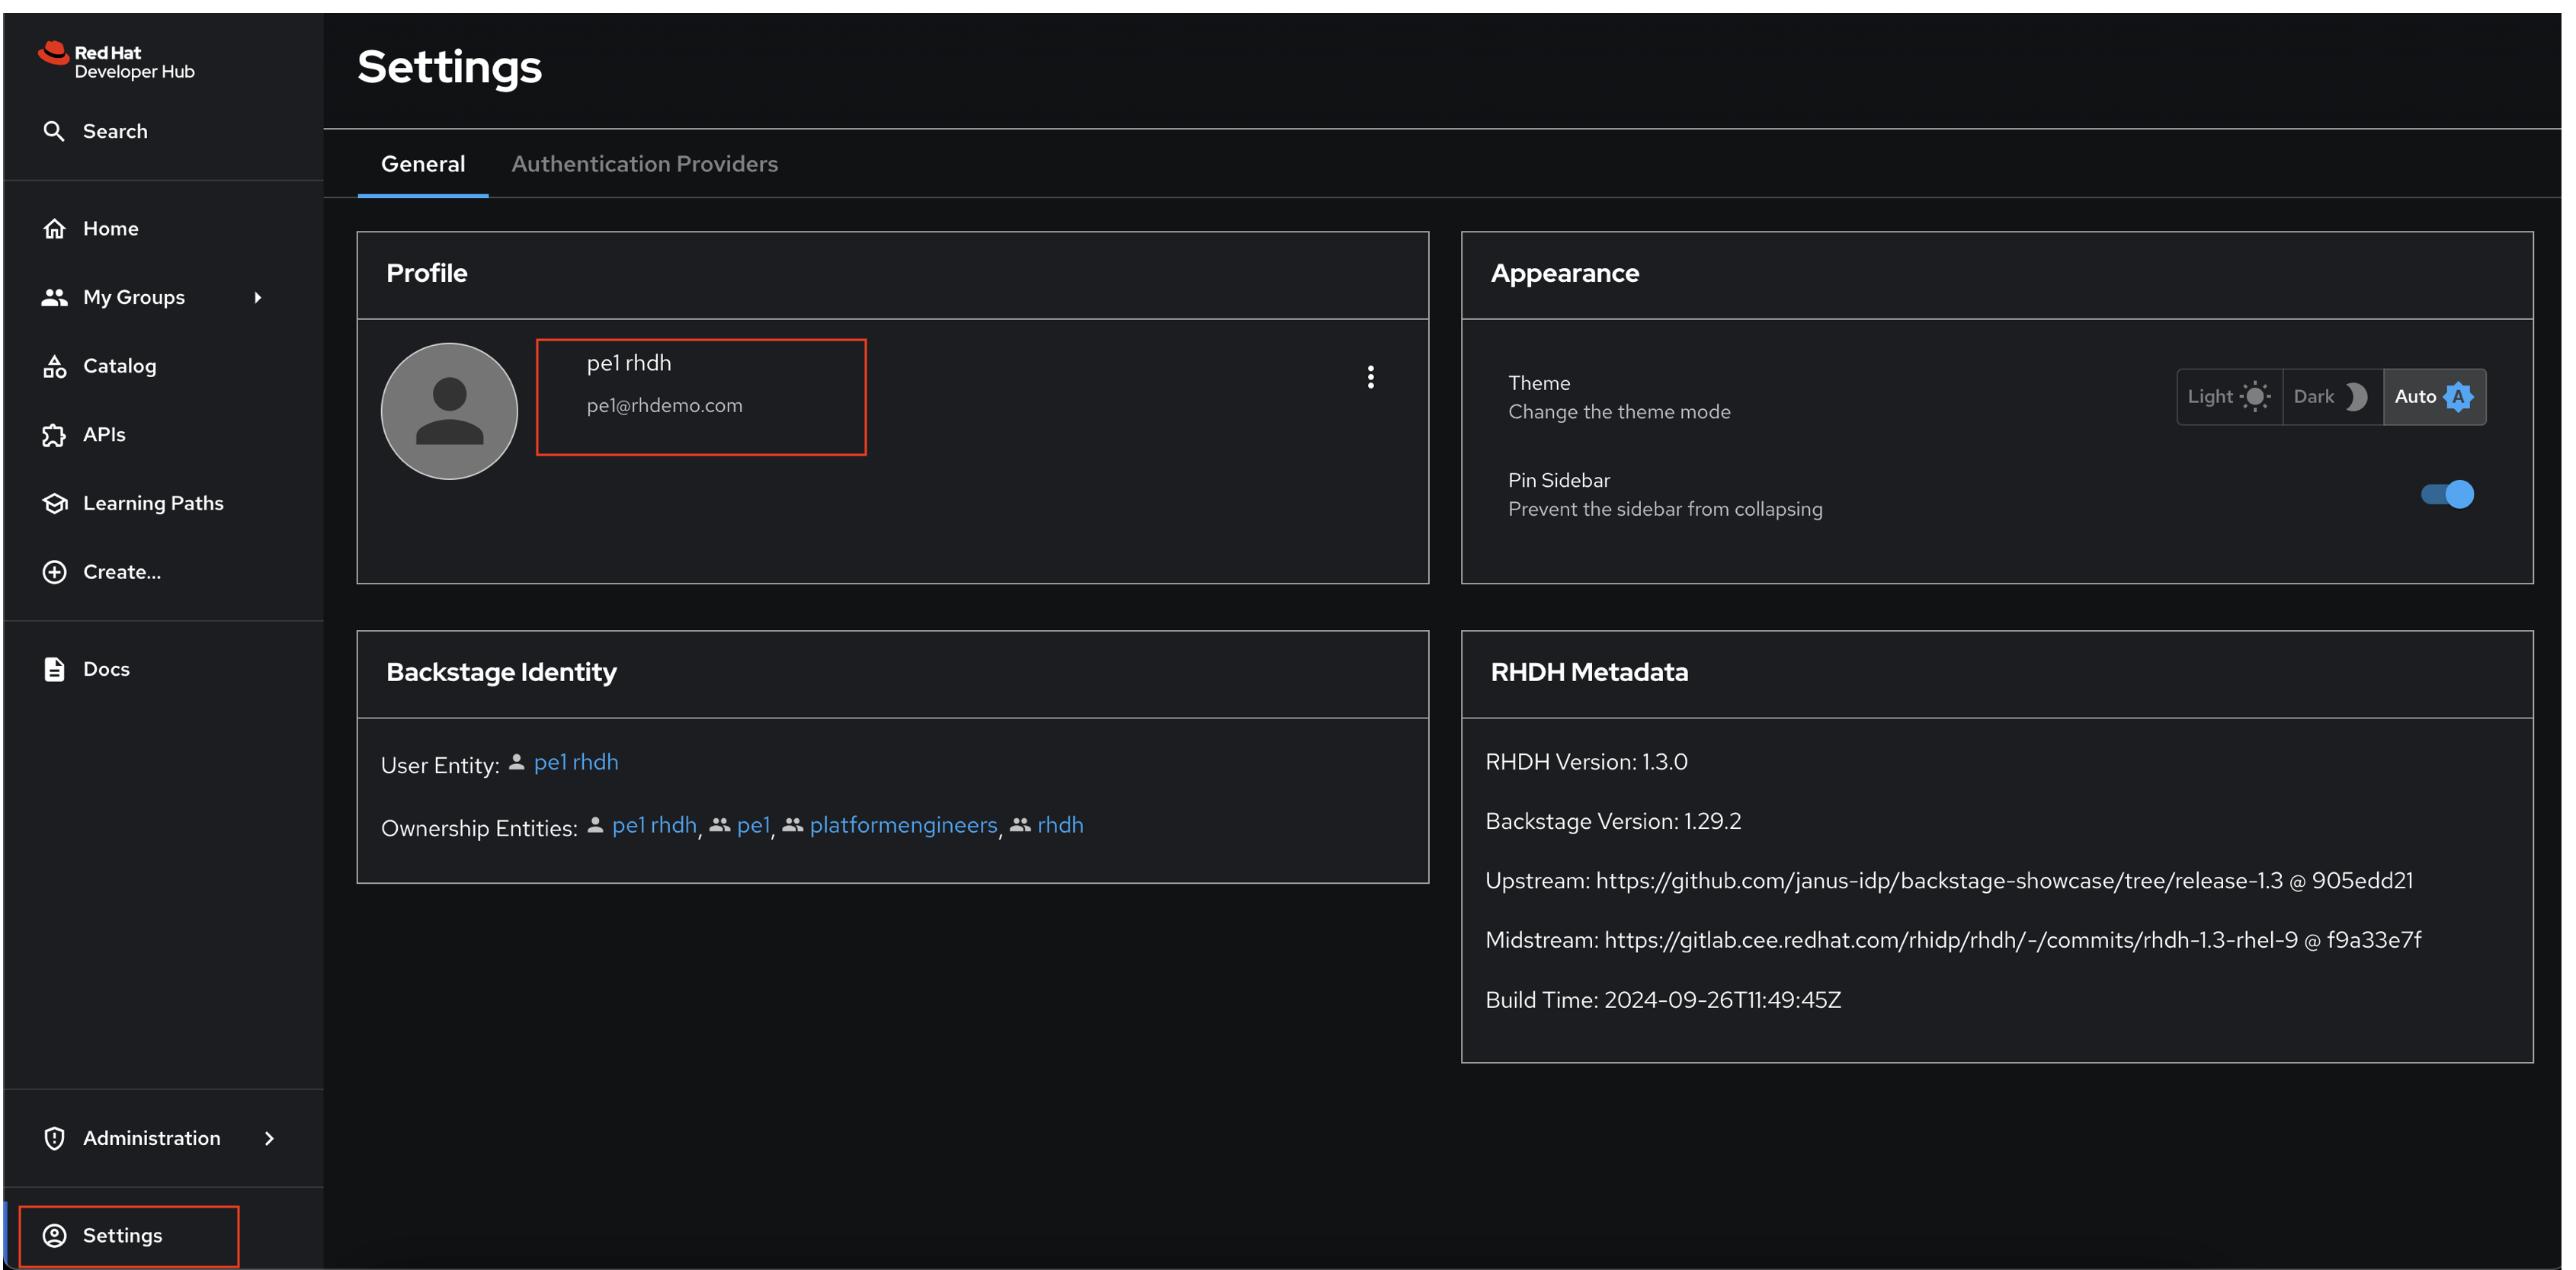
pe1and password{common_password}in the popup that appears. After logging in, visit the Settings page in Red Hat Developer Hub to confirm you’re logged in as thepe1user.