Platform Engineer Activity: Setup Software Templates to Import Existing API/Apps
As mentioned in the previous section, the Platform Engineering team created two Templates for importing existing applications/services (Components), and APIs into Red Hat Developer Hub. While it is possible to use the same template to import both of them, there are some key differences in the data that must be gathered for API and Component Entities.
Please make sure to log in as a Platform Engineer with pe1 / {common_password}. Refer to the below guide for assistance.
|
Click to learn how to login as a Platform Engineer
Login as Platform Engineer
You will perform this activity as a Platform Engineer. Please follow the below steps to logout from Red Hat Developer Hub and GitLab, and login back as a Platform Engineer (pe1 / {common_password})
-
Logout from Red Hat Developer Hub
-
Sign out of Red Hat Developer Hub from the Profile dropdown as shown in the screenshot below.

-
-
Logout from GitLab
-
Click on the Profile icon, and Sign out from the dropdown as shown in the screenshot below.

-
-
Login back as a Platform Engineer to Red Hat Developer Hub and GitLab using the credentials
pe1/{common_password}
Register the Import API and Component Templates
Software Template Overview
You learned how to create and import Software Templates using the Red Hat Developer Hub UI in module 3. In this section, you’ll import Templates that have been pre-built for you by adding them directly to the catalog.locations configuration in your values.yaml file instead of using the UI registration wizard.
The two Software Templates you’ll be importing are:
-
import-existing-api - Available in the import-existing-api-template/template.yaml file in GitLab
-
import-existing-app - Available in the import-existing-app-template/template.yaml file in GitLab
The import-existing-api template does the following:
-
Gather details of the API (GitLab org name, repo name) as template parameters.
-
Creates a Merge Request to create the new catalog-info.yaml and TechDocs files, which will register the API in the Software Catalog once merged.
The import-existing-app template does the following:
-
Gather details of the new Component to be created (Git repository for the Component, the catalog info, etc.)
-
Creates a Merge Request to create the new catalog-info.yaml and TechDocs files, which will register the Component in the Software Catalog once merged.
Add Templates to Catalog Configuration
-
Visit your rhdh/developer-hub-config repository on GitLab. If prompted, login with
pe1/{common_password}. -
You should already be in Edit mode of the
values.yamlfile if you clicked the link above. -
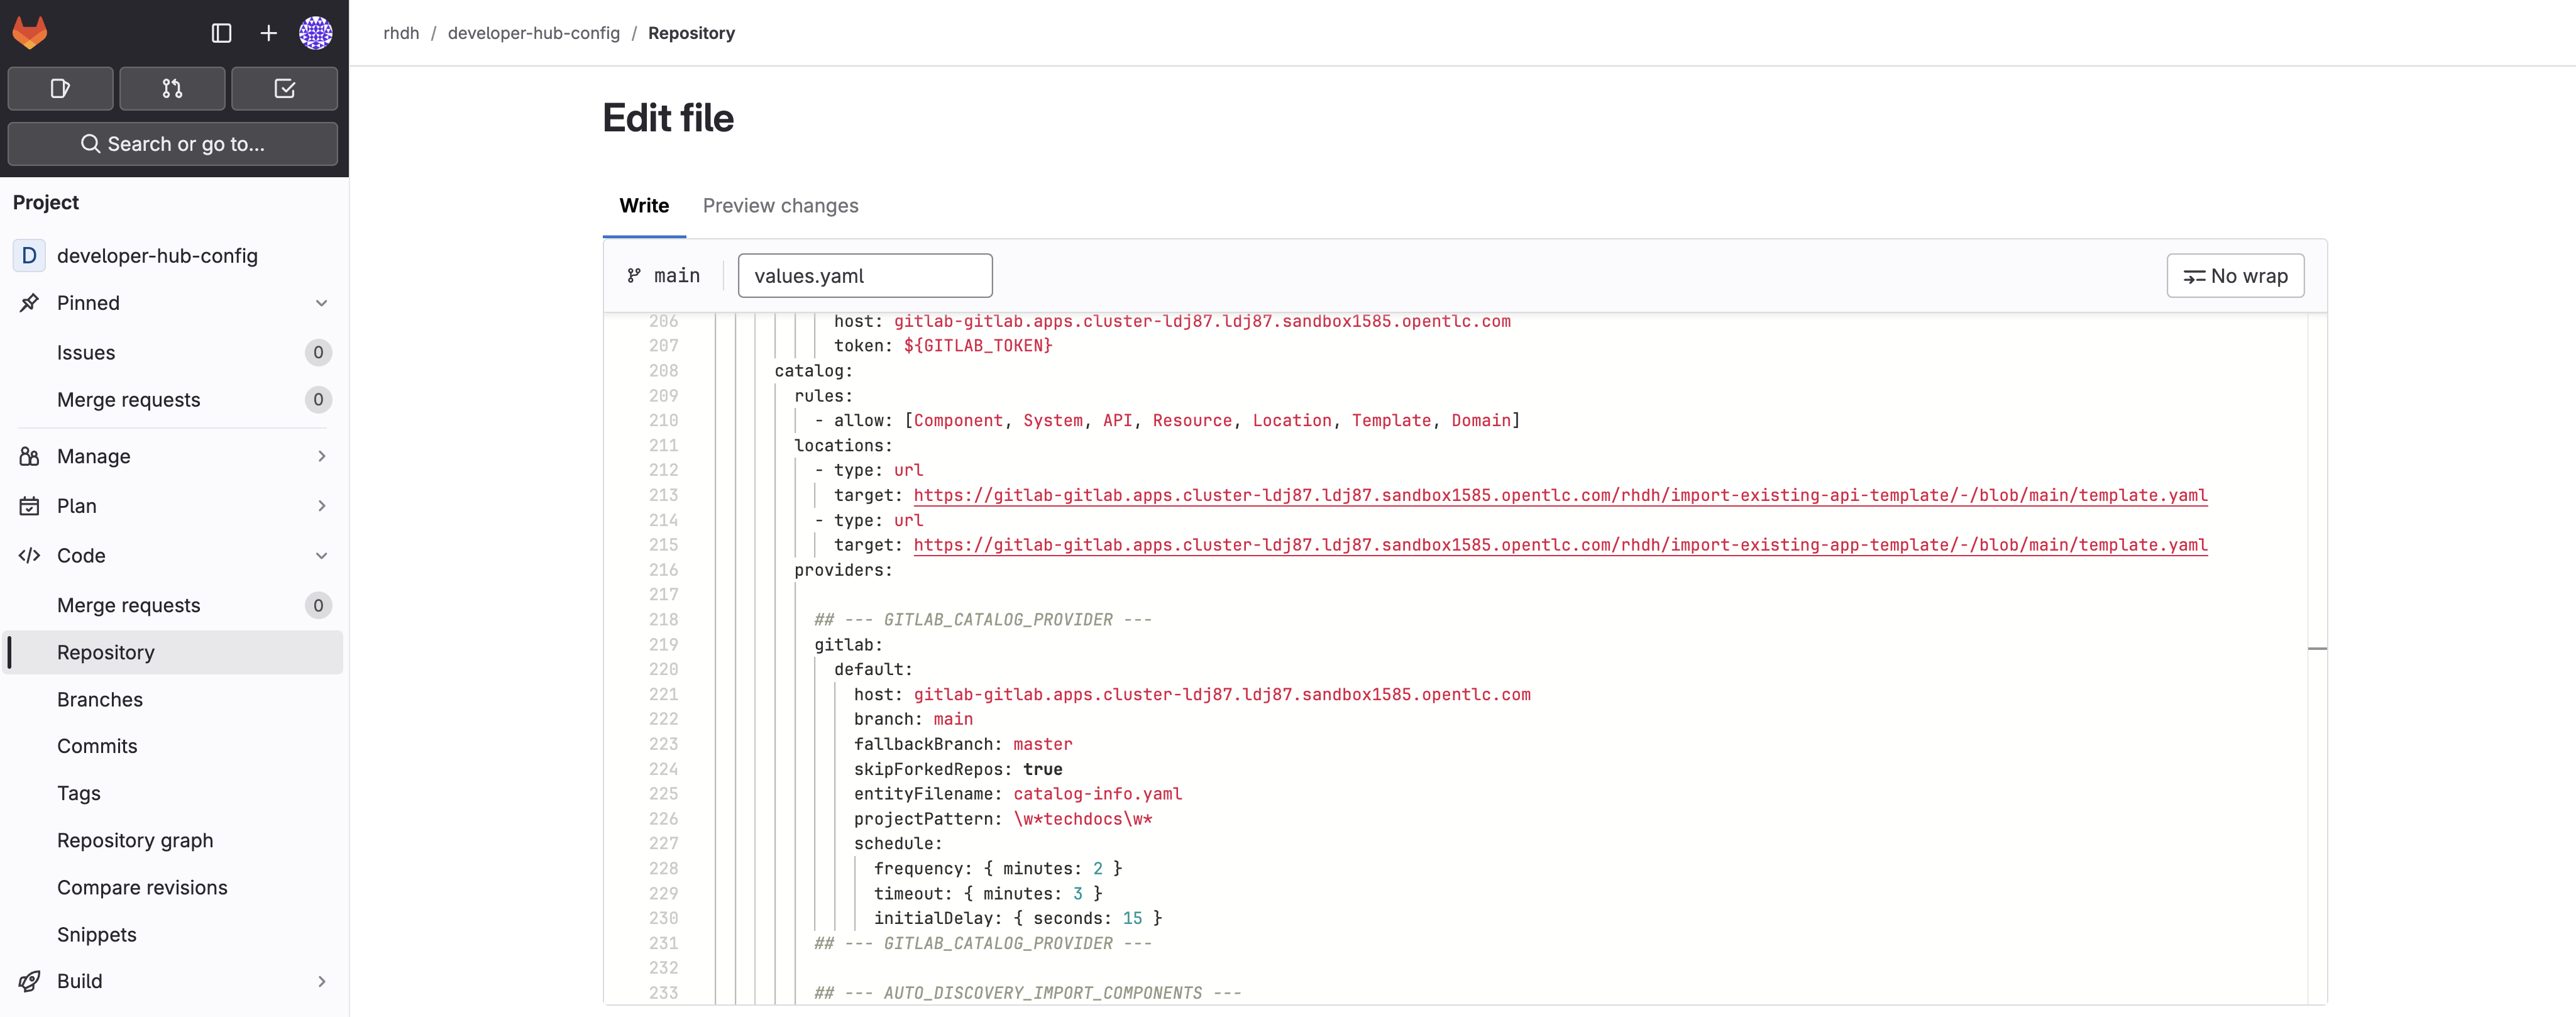
Locate the
catalog:section and find thelocations:array. -
Add the following two new entries to the
locations:array to import both Software Templates:catalog: locations: - type: url target: https://gitlab-gitlab.{openshift_cluster_ingress_domain}/rhdh/import-existing-api-template/-/blob/main/template.yaml - type: url target: https://gitlab-gitlab.{openshift_cluster_ingress_domain}/rhdh/import-existing-app-template/-/blob/main/template.yamlMake sure to maintain proper YAML indentation and alignment with the existing locations:entries. -
Don’t commit the changes yet - you need to also enable the required dynamic plugins for these templates to function properly.
Your changes in GitLab should resemble the following screenshot.
Setup GitLab Entity Auto-Discovery
The new templates require plugins to function, and ensure the newly created Entities are detected by Red Hat Developer Hub:
-
backstage-plugin-catalog-backend-module-gitlab-dynamic to enable auto-discovery of
catalog-info.yamlfiles. -
immobiliarelabs-backstage-plugin to create Merge Requests using the GitLab API.
Enable the Plugins
-
Visit your rhdh/developer-hub-config repository on GitLab. If prompted, login with
pe1/{common_password}. -
You should already be in Edit mode of the
values.yamlfile. -
Locate the comment
--- DYNAMIC_PLUGINS_IMPORT_COMPONENTS --- -
Highlight the YAML section shown in the below screenshot, and uncomment those lines. Use
CMD + /orCTRL + /to do so.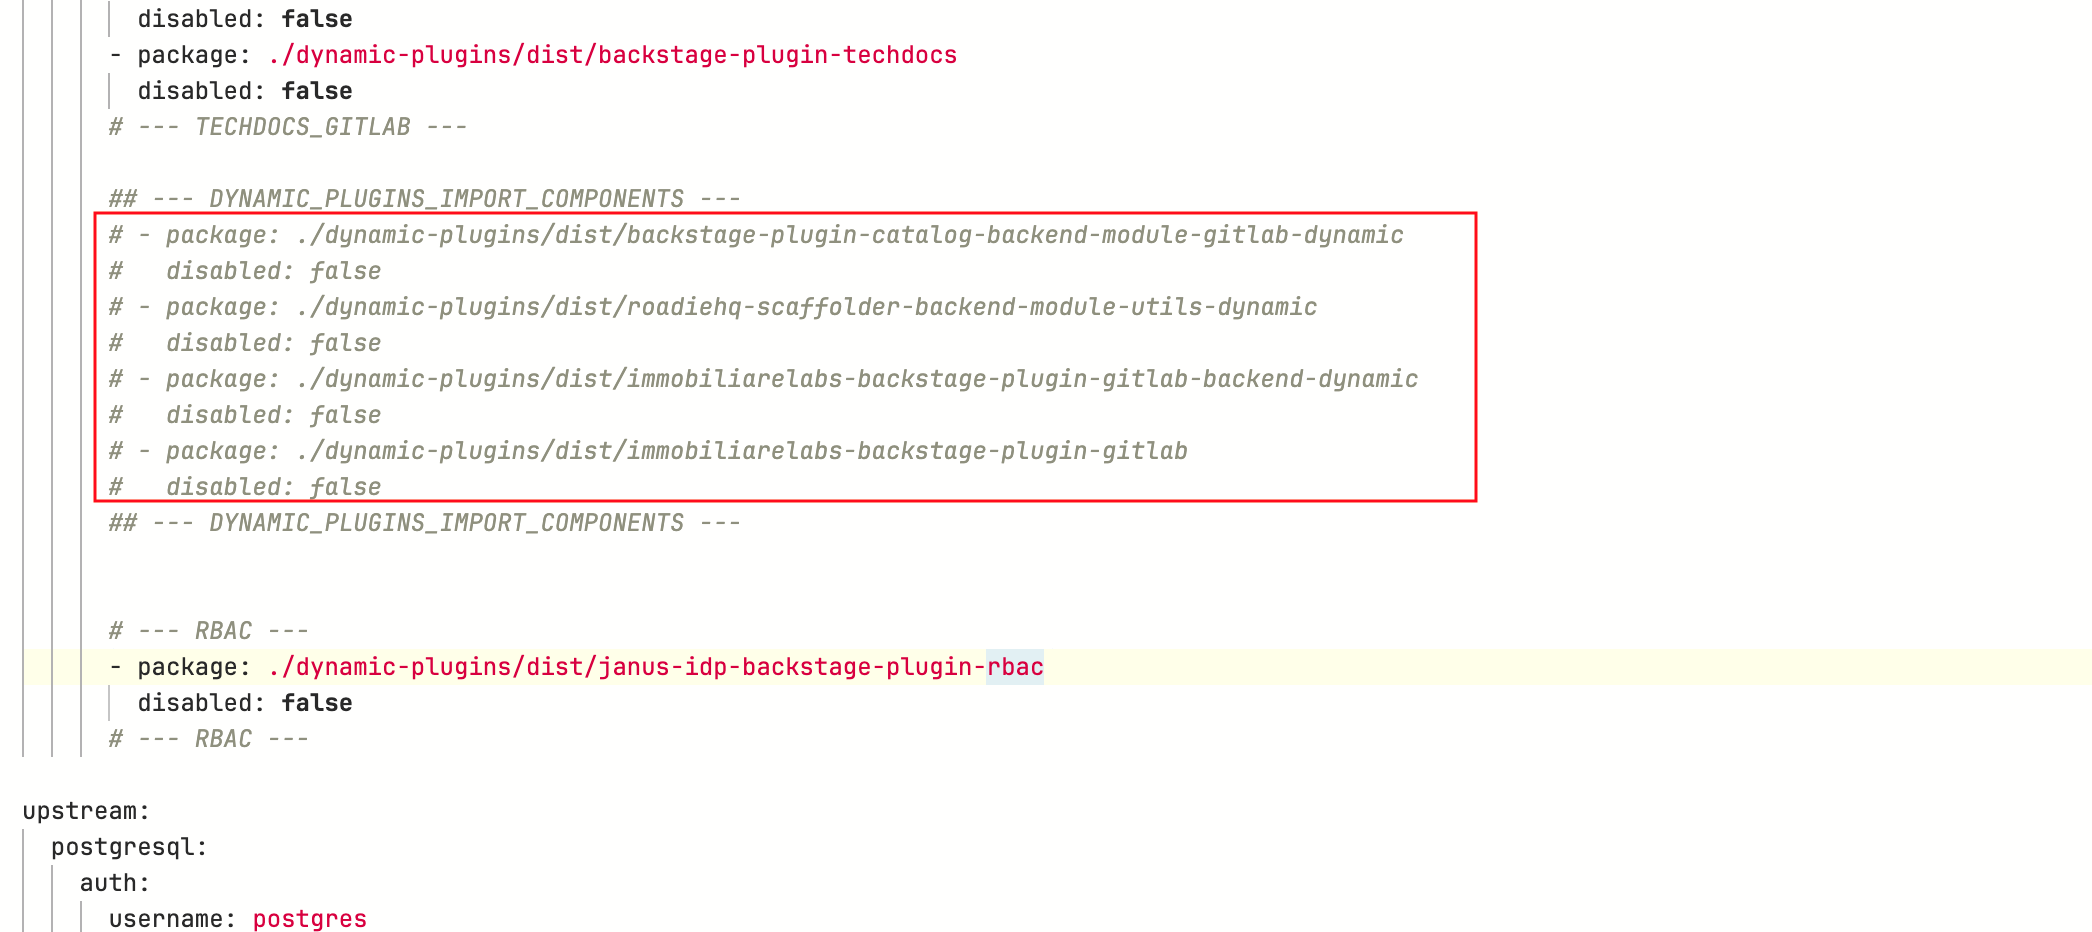
-
Don’t commit the changes yet - you need to also enable auto-discovery.
Enable Auto-Discovery
-
Locate the comment
--- AUTO_DISCOVERY_IMPORT_COMPONENTS ---in the samevalues.yamlfile. -
Highlight the YAML as shown in the below screenshot, and uncomment those lines.
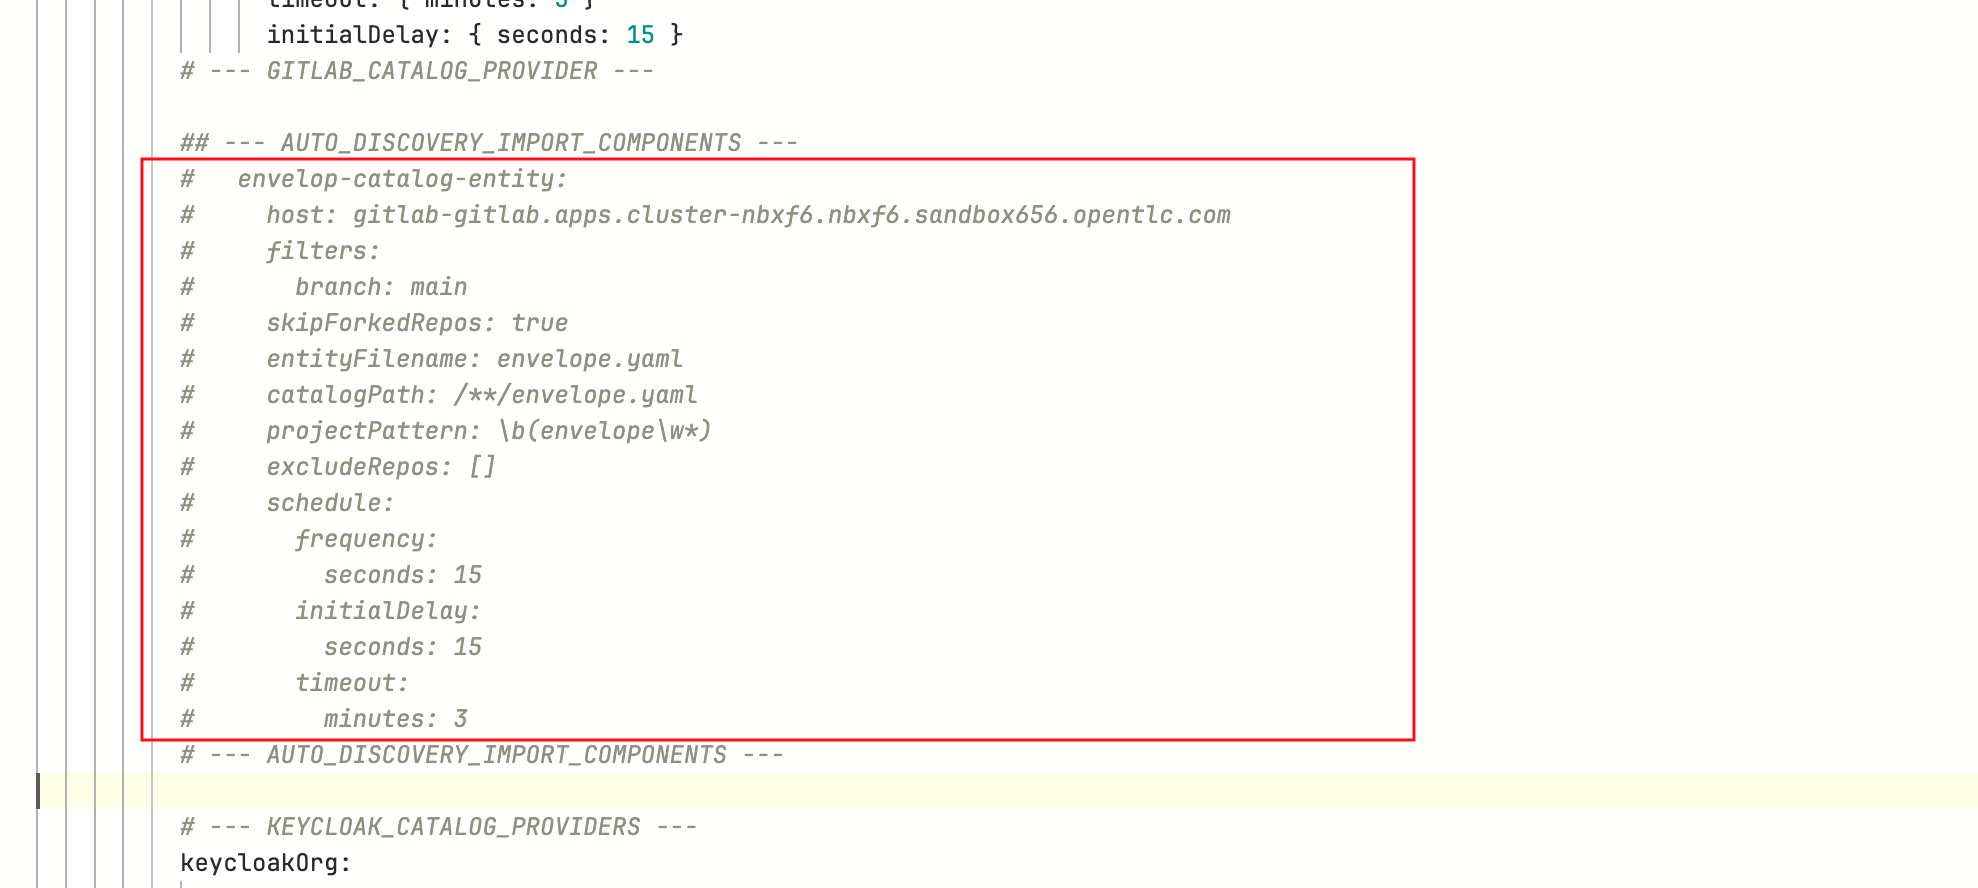
This YAML snippet enables auto-discovery for all files named all-location.yaml (the entityFilenameoption) where the repo name starts with the word all-location (theprojectPatternoption). -
Scroll down and enter a commit message
feat: Enable GitLab plugin and component auto discovery. -
Commit the file now using the Commit Changes button at the bottom of the page.
-
Refresh the
backstageApplication to rollout the new Red Hat Developer Hub configuration - login asadmin/{openshift_gitops_password}. Wait until the Application turns green and marked as Healthy.
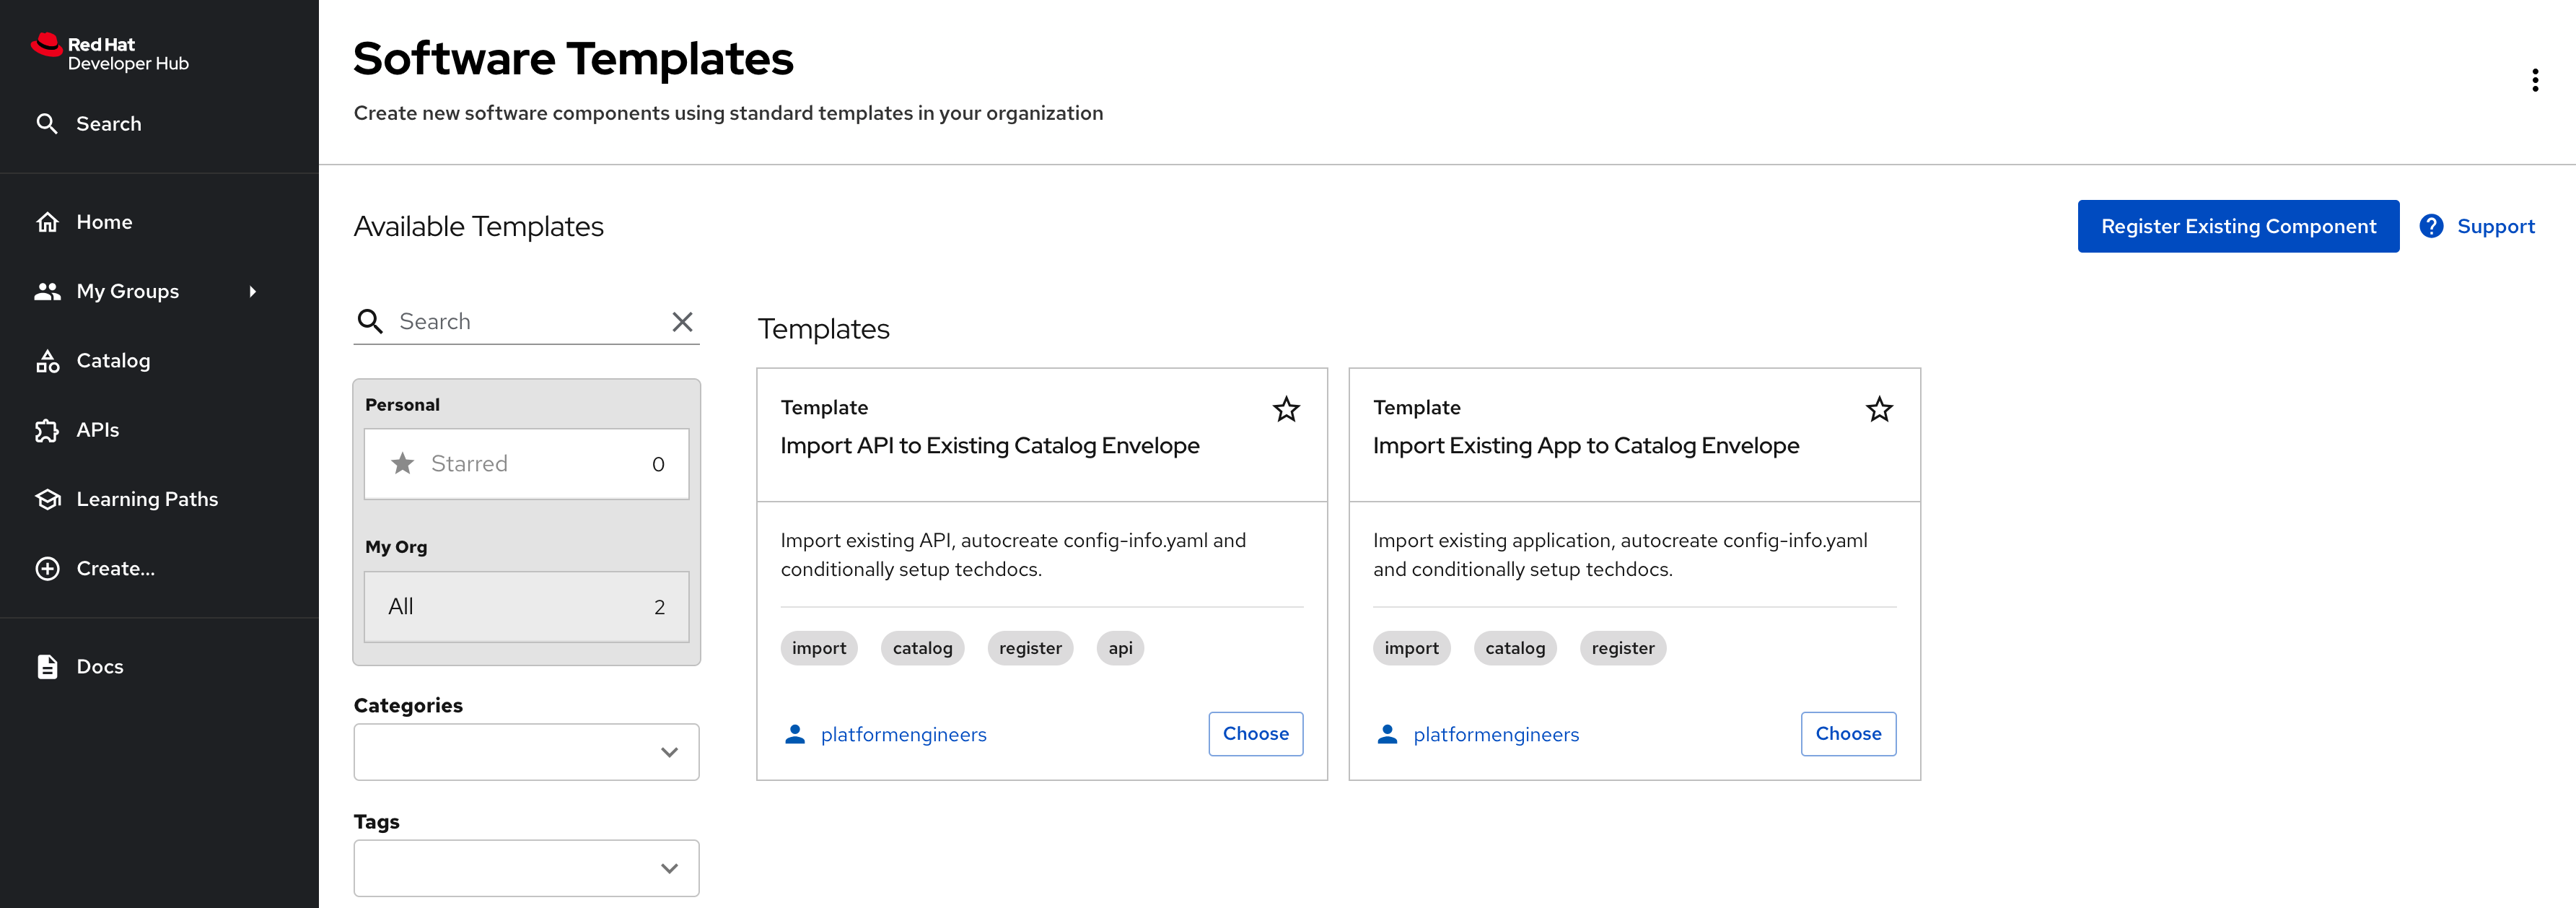
View the Imported Templates
After you complete the configuration in the following sections and commit your changes, you can verify the templates are available by navigating to the Create screen. You should see both templates for importing APIs and applications to Red Hat Developer Hub.
Onboard Parasol’s System and Domain
In a previous chapter you learned how System and Domain Entities help organize and provide a hierarchy of Components in Red Hat Developer Hub. In this section you will setup Parasol’s System and Domain.
-
From Red Hat Developer Hub, navigate to Create screen; choose Register Existing Component button
-
Paste the below URL and click on Analyze
https://gitlab-gitlab.{openshift_cluster_ingress_domain}/rhdh/rhdh-entities/-/blob/main/locations.yaml -
Click Import in the Review section.
-
The Systems and Domain are setup.
|
Systems are the basic level of encapsulation for related entities. Domains are useful to group a collection of Systems that share terminology, domain models, business purpose etc. |