Platform Engineer Activity: Setup Role-Based Access Control
By setting up Role-Based Access Control (RBAC), the Platform Engineer can restrict the visibility of entities and availability of actions to subsets of users. It’s possible to define roles with specific permissions and then assign those roles to the Users/Groups to meet the specific needs of your organization and teams. RBAC can be configured via the Red Hat Developer Hub UI and REST API, or by using configuration files.
In this module you will
-
Define policies in a declarative fashion using a configuration file.
-
Create a ConfigMap to hold your RBAC configuration file.
-
Configure Red Hat Developer Hub to use this ConfigMap.
RBAC Configuration File Overview
Policies are stored on OpenShift using a ConfigMap. The ConfigMap containing policies has has been pre-deployed to streamline this section of the workshop. Click here to view the policies in the OpenShift backstage namespace. The RBAC policies are defined using the Casbin rules format.
|
Casbin is a powerful and efficient open-source access control library that supports various access control models for enforcing authorization. For information about the Casbin rules format, see Basics of Casbin rules. |
Policies define roles and their associated permissions, and assign roles to groups and users. The following example states that any user or group with role role:default/platformengineer can create Catalog Entities:
p, role:default/platformengineer, catalog.entity.create, create, allowTo assign this role to a group group:default/platformengineers, you’d use the following sytntax:
g, group:default/platformengineers, role:default/platformengineerThe result is that users belonging to the platformengineers group can create Catalog Entities.
Enable the RBAC Plugin and Setup the Policies
As with other Red Hat Developer Hub plugins, enabling RBAC involves modifying the configuration file stored in GitLab.
-
Access the rhdh/developer-hub-config configuration on GitLab.
-
Select Edit > Edit single file. When prompted, login as
pe1/{common_password}. -
There are 2 sections in the Red Hat Developer Hub configuration which refer to the RBAC setup, both under
-- RBAC --blocks. You can useCMD + /orCTRL + /keys to uncomment the blocks.-
Look for the first block; This enables the
backstage-community-plugin-rbacdynamic plugin which allows you to assign permissions to users and groups; highlight this block and uncomment it.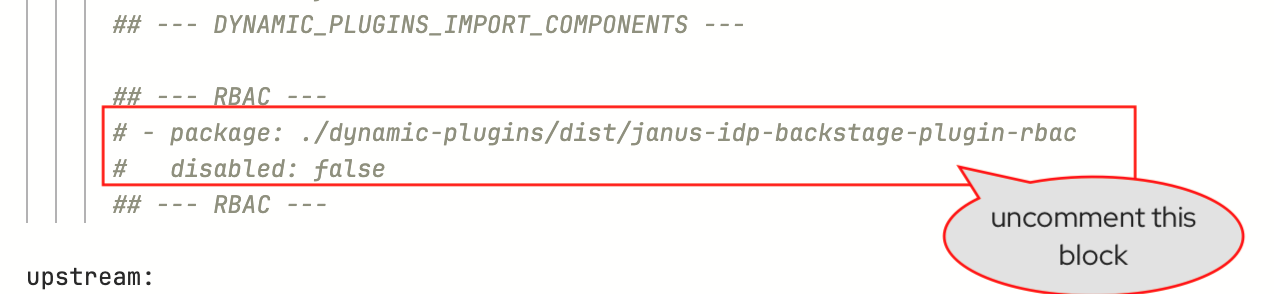
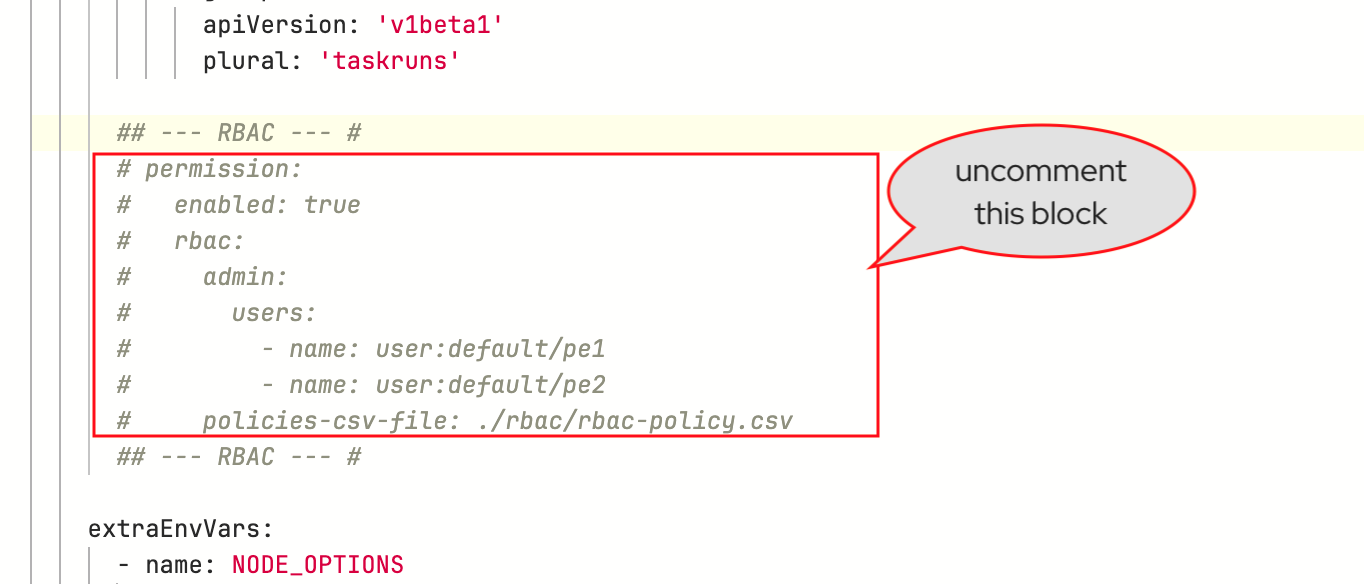
-
The second block defines RBAC admin users and references the file contained in ConfigMap explained in the previous section; highlight and uncomment it.
-
Scroll down and enter a commit message:
feat: enable RBACand click the Commit button.
-
-
Visit the
backstageApplication in OpenShift GitOps (login usingadmin/{openshift_gitops_password}) and click Refresh. Wait until it reports aHealthystatus.
Test the RBAC Configuration
As a Platform Engineer
-
Ensure you’re logged in as a Platform Engineer.
Click to see how
-
Navigate to Red Hat Developer Hub’s Settings screen and check the logged-in user’s name under the Profile section.
-
If you are not logged in as a Platform Engineer (
peuser), Click on Sign Out. -
Log in as
pe1/{common_password}.
-
-
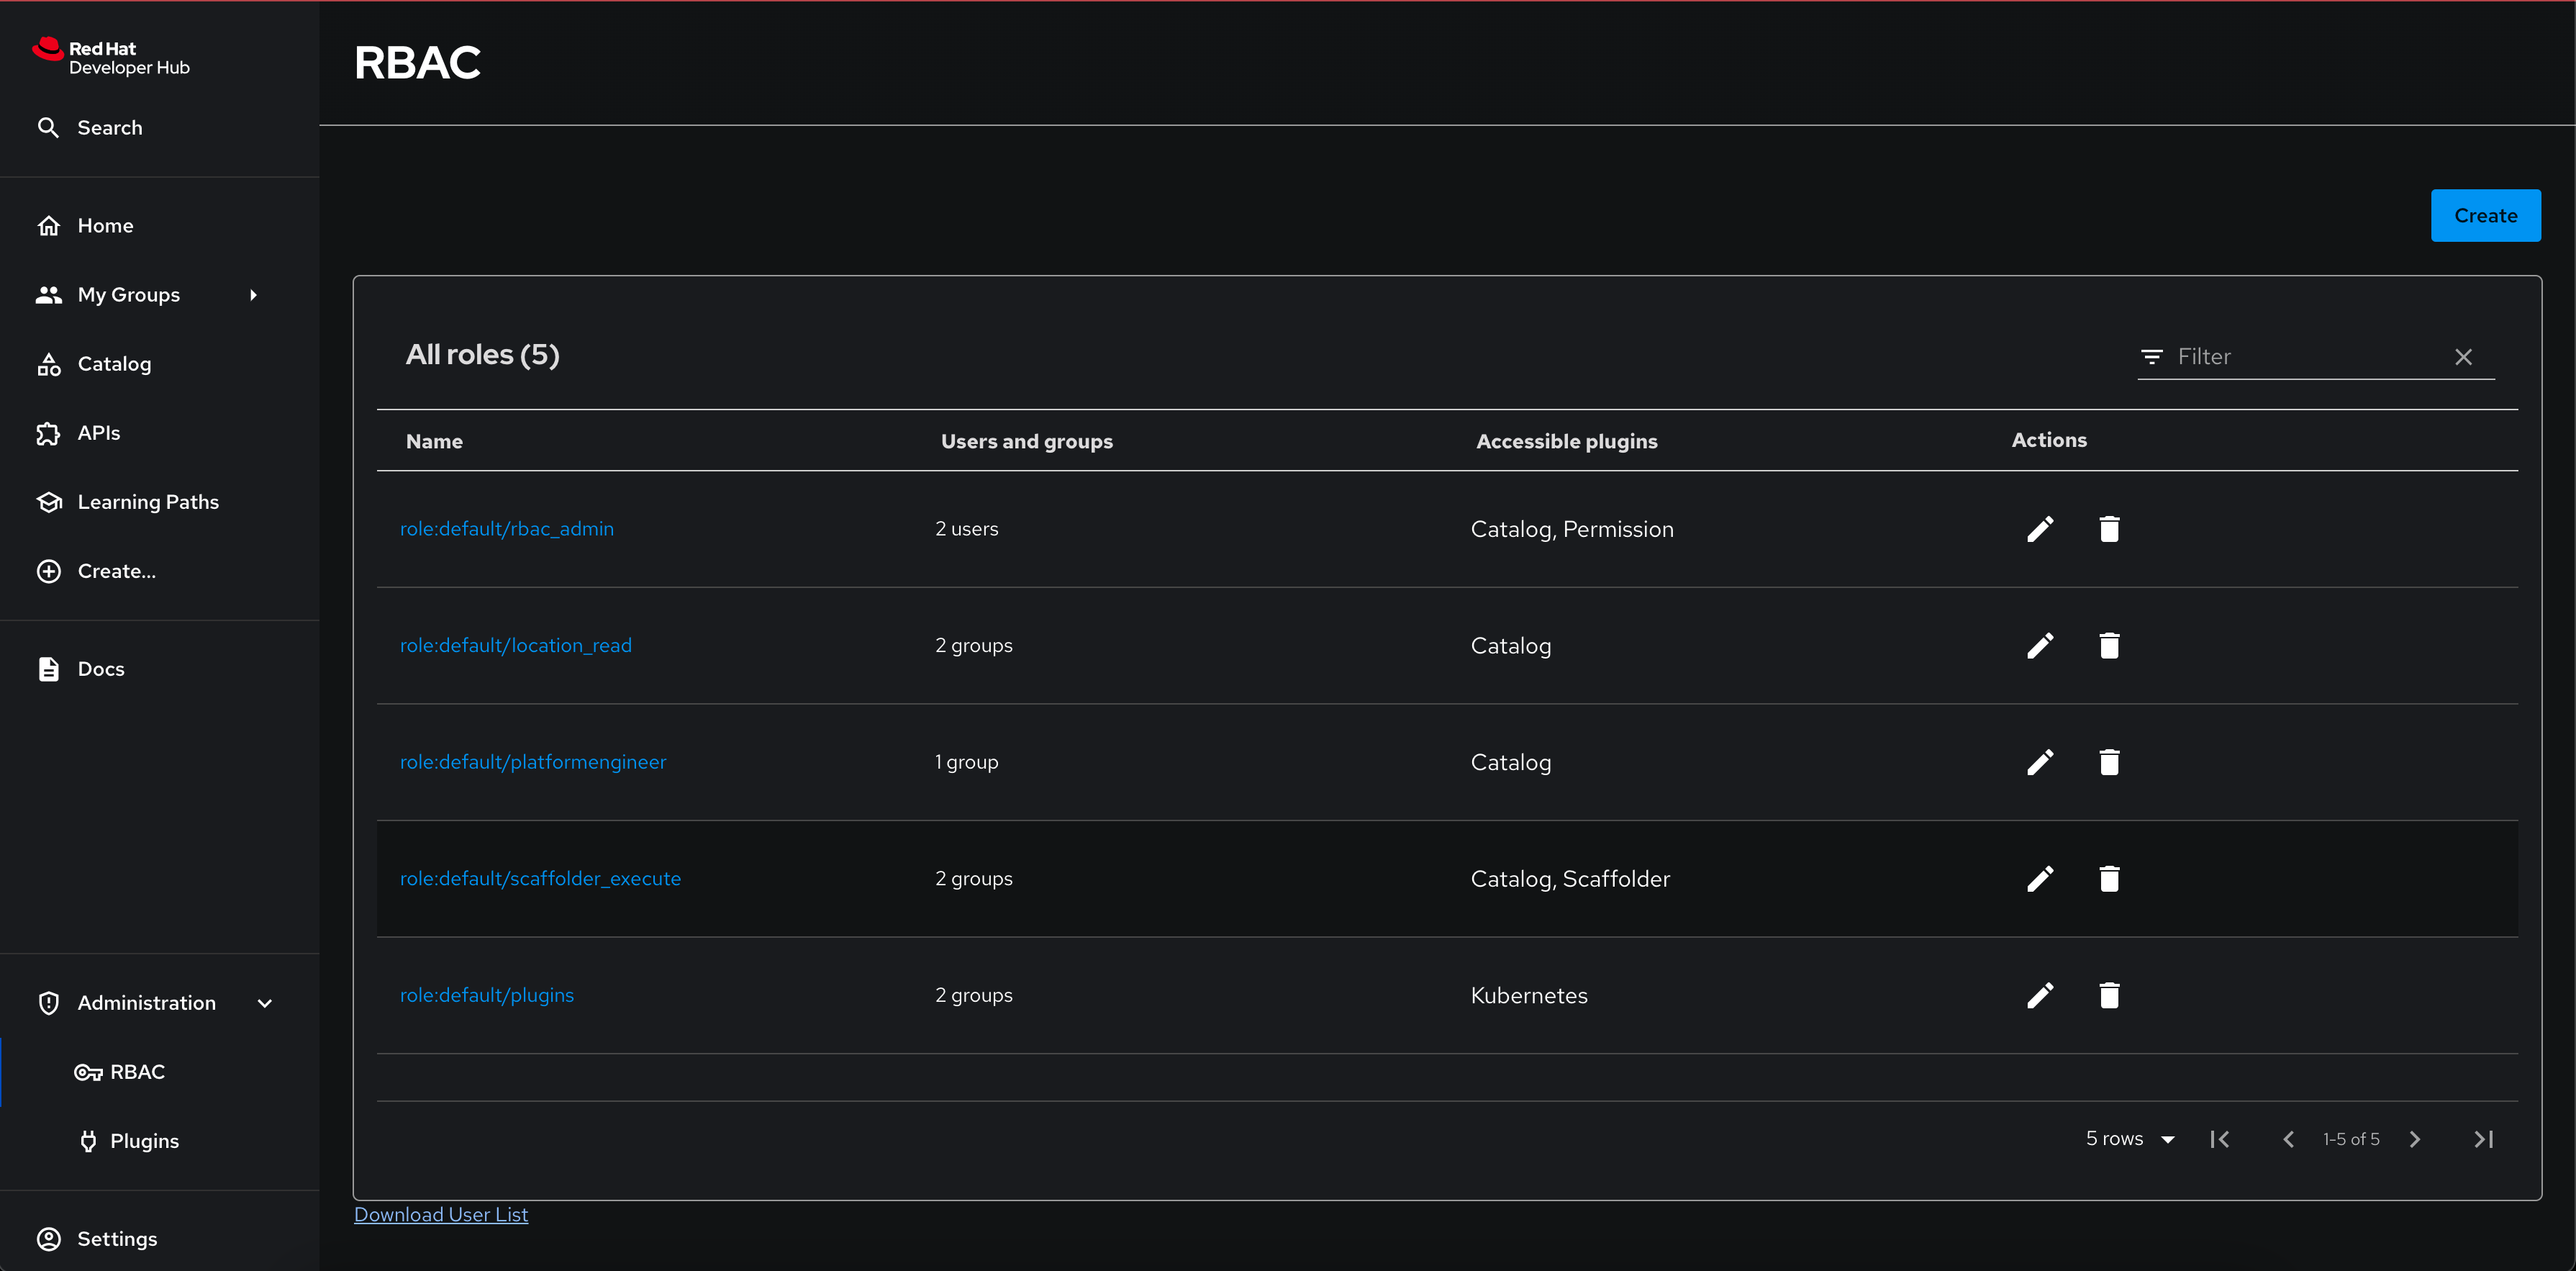
You will now be able to view the RBAC policies you setup in the Administration > RBAC left-hand menu.
-
Policies managed using a CSV file cannot be edited or deleted using the Red Hat Developer Hub Web UI.
-
You can download the list of users in CSV format using the Red Hat Developer Hub web interface.
-
This downloaded file contains a list of active users and last logged in times as shown below
userEntityRef,displayName,email,lastAuthTime
user:default/dev1,dev1 rhdh,dev1@rhdemo.com,"Tue, 10 Dec 2024 05:25:00 GMT"
user:default/pe1,pe1 rhdh,pe1@rhdemo.com,"Tue, 10 Dec 2024 05:25:22 GMT"
-
-
Navigate to the Create screen and confirm you can see the Register Existing Component button.
As a Developer
-
Logout from your pe1 user, and log back in as a developer with
dev1/{common_password}. -
You will not be able to see the Administration > RBAC menu, since developers are not assigned the
adminrole in the Red Hat Developer Hub configuration. -
Navigate to the Create screen.
-
Note that you cannot see the Register Existing Component button. You can still use the templates already created.
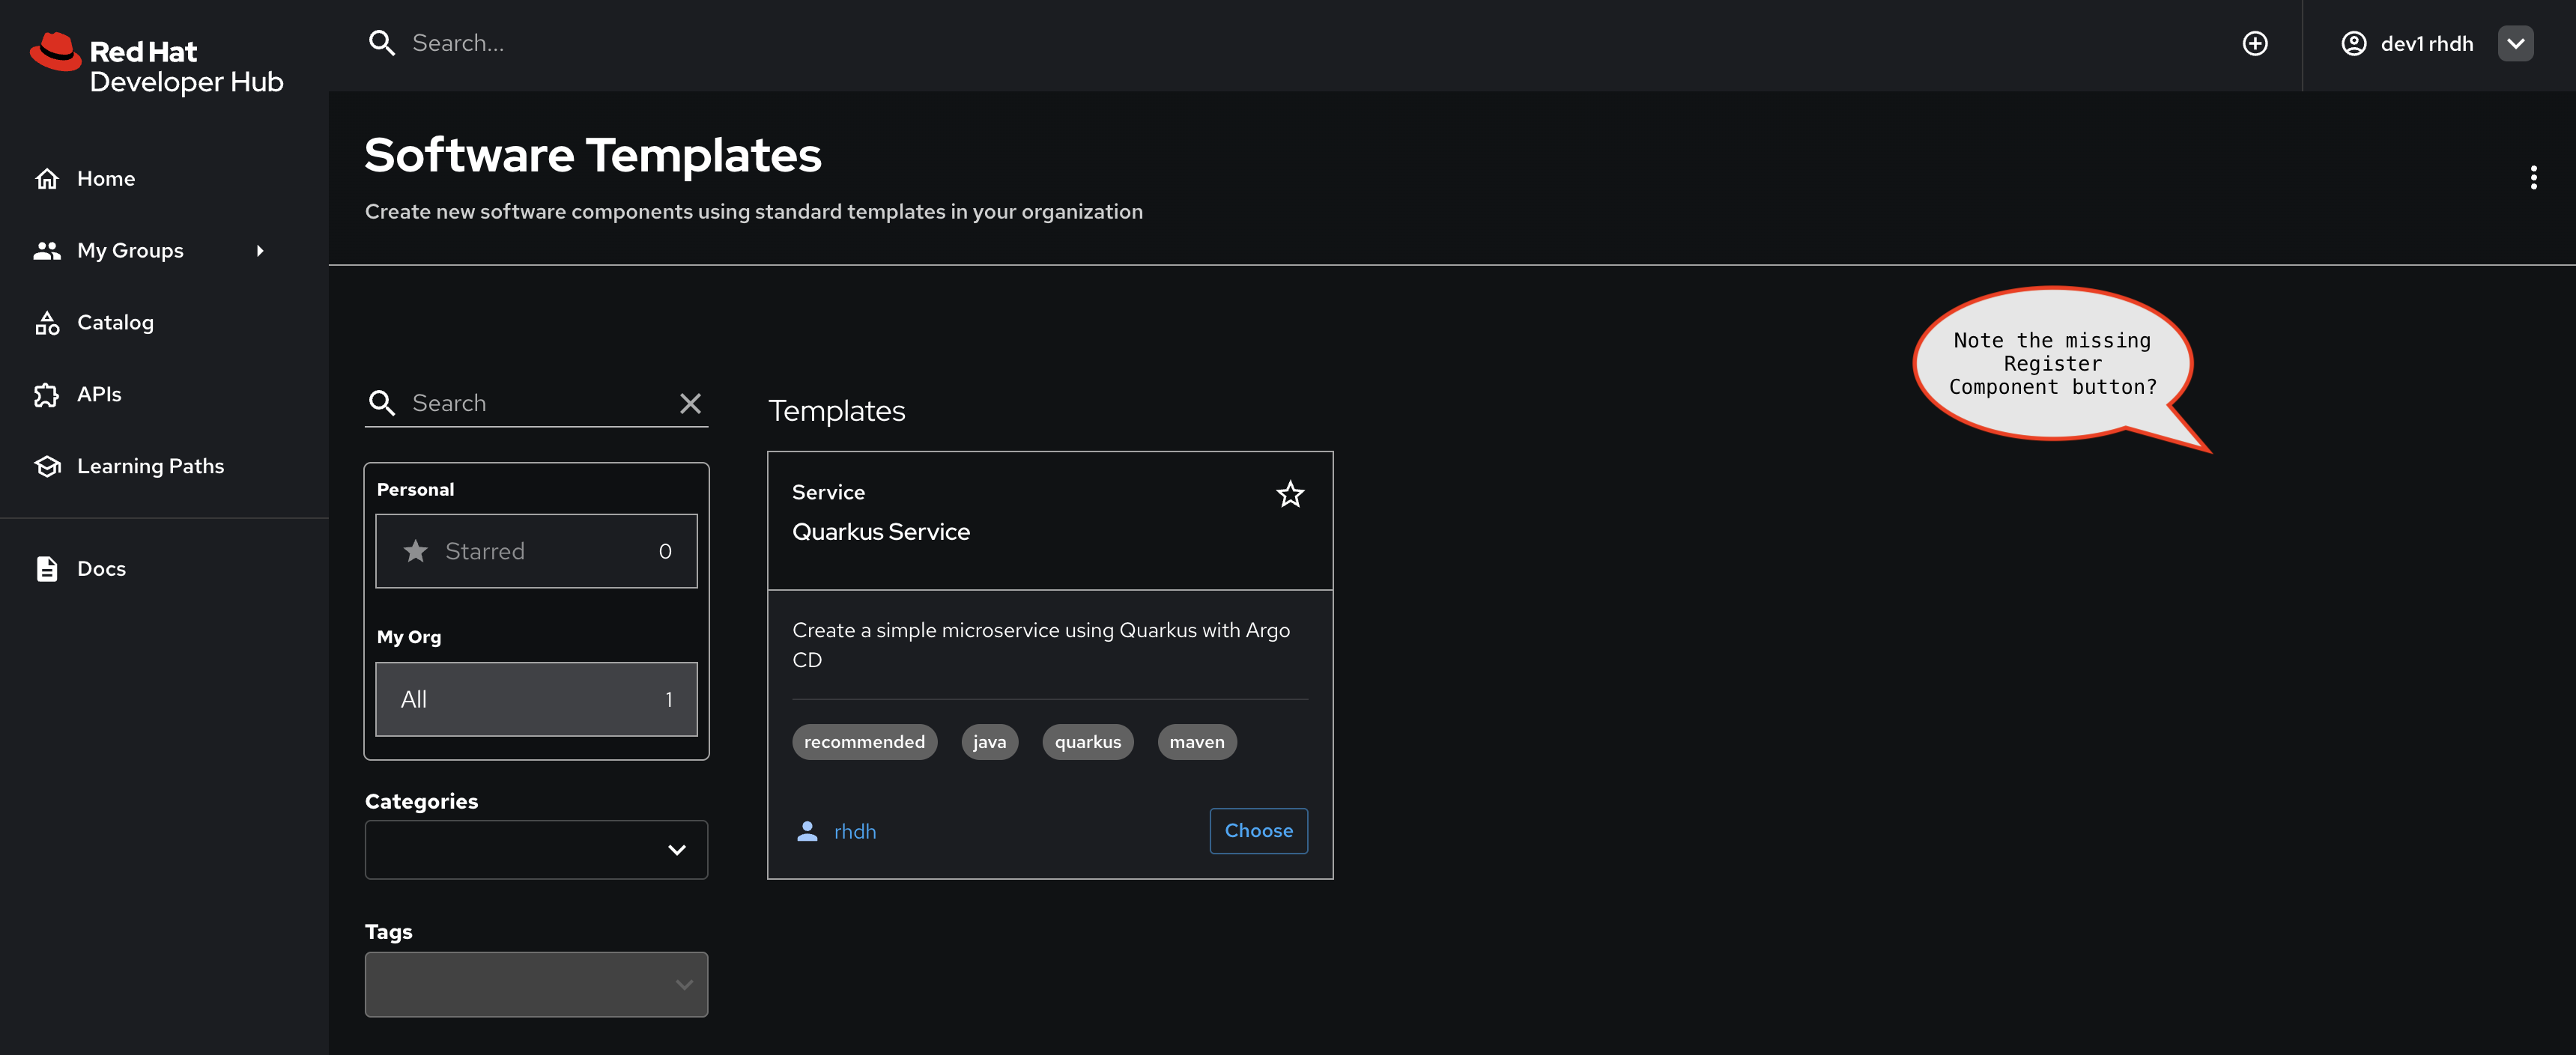
-
This is because, as we saw earlier, the RBAC policy has been setup to allow
catalog.entity.createonly forgroup:default/platformengineers
Conclusion
So far in this workshop we assumed that only Platform Engineers can create Catalog Entities, but without configuring RBAC policies any user can create, edit, and delete Entities. Using RBAC allows you to configure read/write access as it suits your organization.
For details on other ways to setup RBAC polices refer to the Authorization guide in the Red Hat Developer Hub documentation.